Navigation
SEARCH
This form does not yet contain any fields.

    Entries in pink (35)

    Thursday
    May312012

    Fondant Masquerade Masks

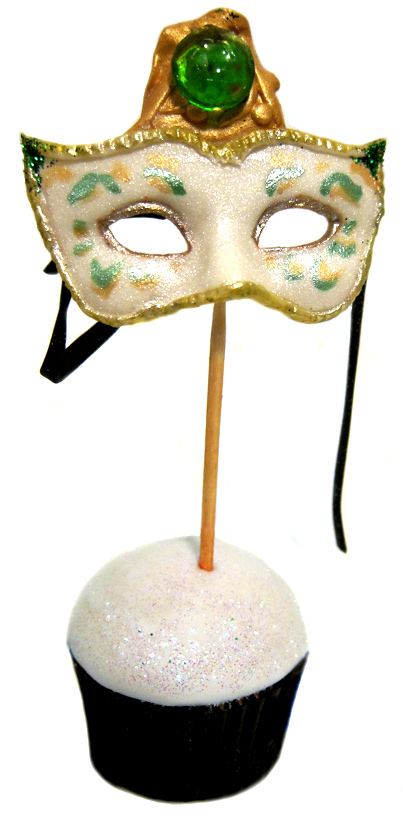
                       green with envy fondant masquerade mask

    Join me on facebook... I'd love to see you there

    You are invited to the ball, the Masquerade ball... 

    Special post today on getting more use out of your silicone moulds. Hmmm, doesn't sound that "special" does it? But what you make will be!!
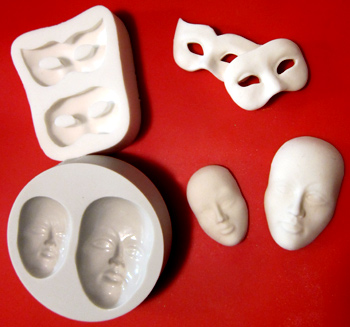
    Don't you love those cake decorating silicone moulds, press in a bit of fondant or modelling paste and hey presto you have a modelled shape in no time. But, but, but, what happens when you have used your mould a few times and you're bored with the shape? Does it end up in the draw with all those other moulds that you just "had to have"? Why don't you try extending the shape, you'll have the time saving aspect of using a mould combined with your own decorating ideas. 
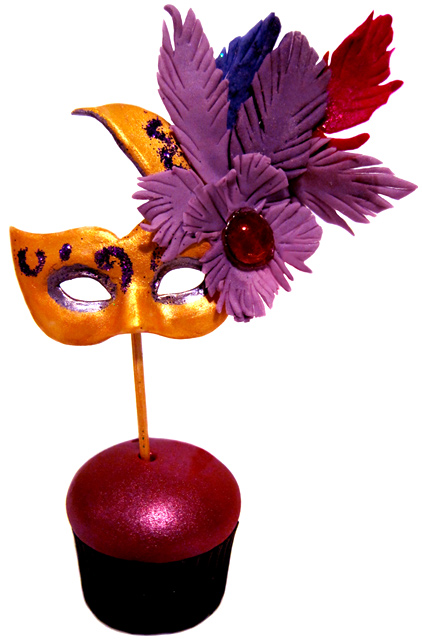
    measuring a tiny 4.5 cm (less that two inches) across the  jewel mask uses the same mould as the green with envy mask in cake one.

    The masquerade masks on cake one and two today are make with the same mould. Cake three adds a mask to the mask mould and cake four gets it's pizzazz from a side extension. All cakes displayed in fondant covered mini cupcakes today.
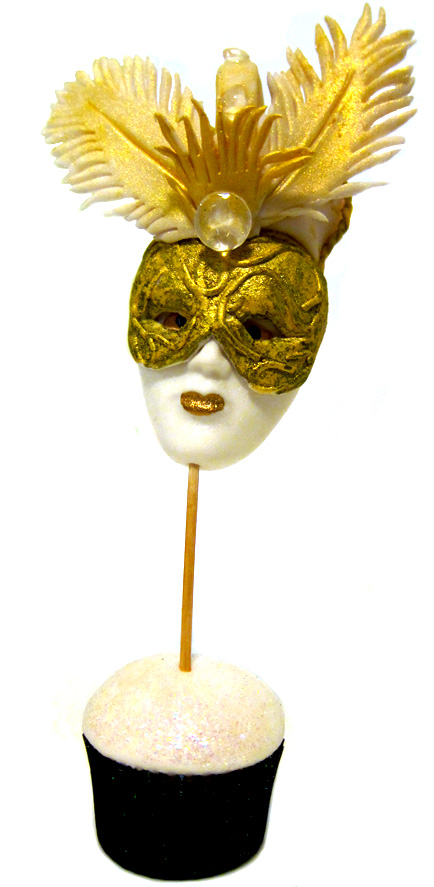
    For the gold and diamond mask I've added a "mask onto the mask"
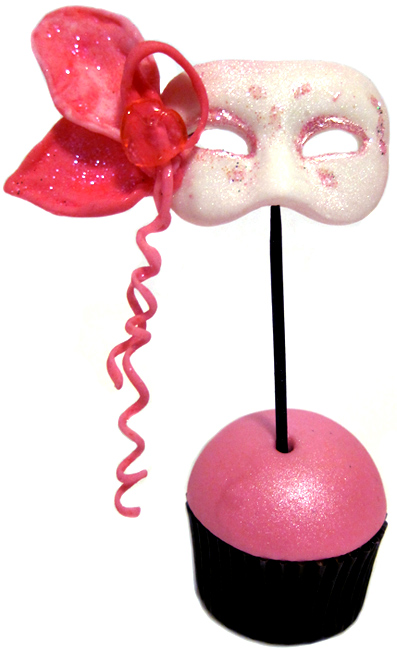
    Pretty in pink mask has a simple side extension added.

    Extensions to your masks can as simple as rolling a thin snake of fondant, from there you twist, twirl and roll to create trims and ribbon.
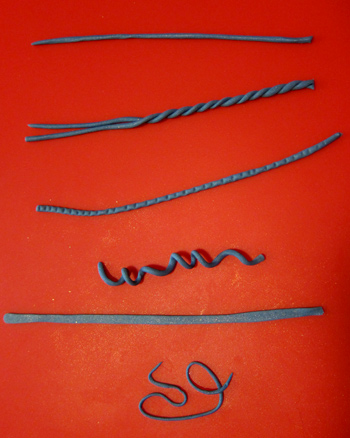
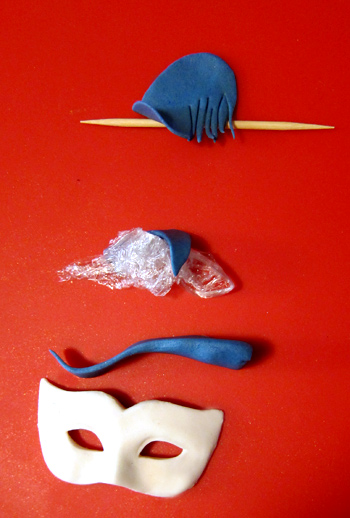
    Create extension pieces by matching the base with mask depth, thinning out from there as required. I use small pieces of plastic wrap to create shapes in the fondant before and after they have been attached to figures. When adding fondant feathers and the like, make sure they are rolled as thinly as possible as you don't want to add too much weight to your pieces.
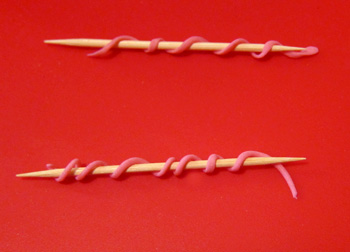
    Use a tootpick/cocktail stick to create twirls.
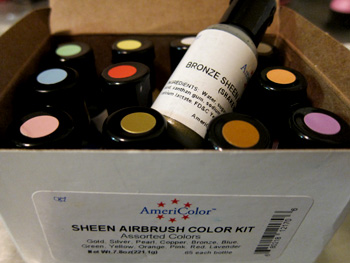
    I used Americolour food spray paint sheen colours undiluted to paint the masks. Try mixing two colours together for a unique finish. A small brush like the type used to paint toy models is ideal for painting trims and details.
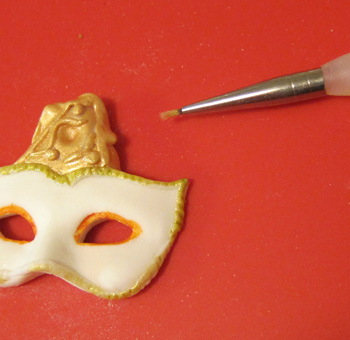
     first of two coats on mask, orange food pen circles eyes before painting to change colour of painted finish.

    All bits and bobs attached with water with the exception of the isomalt gems I attached those with a dab of melted isomalt. Some of the fondant I marbled by twisting several colours of fondant together, I like how that adds a textured element to the feathers. Americolor gel paste was used to colour fondant. Ummm, what else... oh, ok if you want to put your masks on toothpicks make sure you make a hole with toothpick in the unmoulded piece before it hardens.
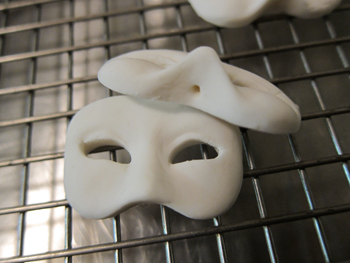
    Have fun getting more from moulds and happy baking :)

    Stockists: Full face mask moulds from Cakes Around Town (Australia) Masquerade Masks mould from Baking Pleasures (Australia) and Windsor Cake Crafts (UK)

    Baking Pleasures has the airbrush sheen colours in Australia (*note we are paying a lot more than the US price)

    Amazon (US)  

    Want more fondant? How about Eric the Valentine Emu
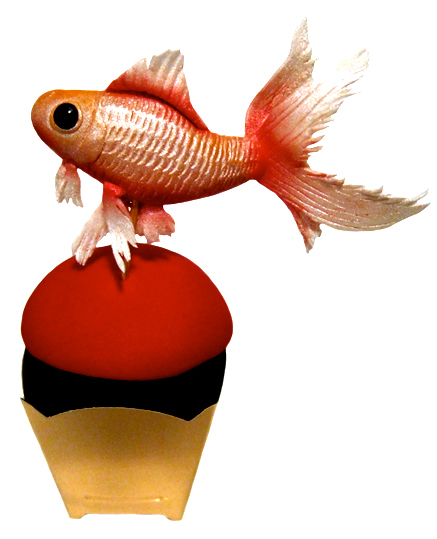
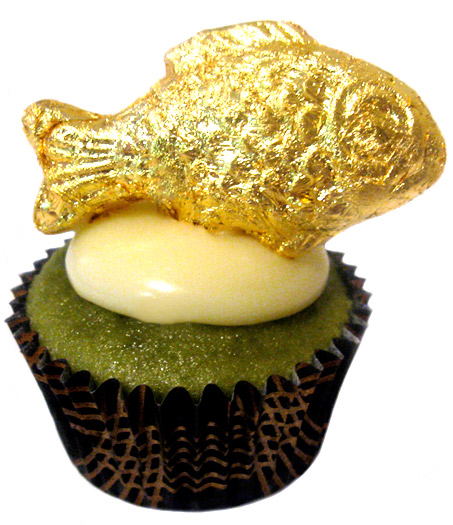
    or go gold with a fondant gold fish
    Sunday
    May272012

    Little Bo Peep Cupcake - Steaming Fondant

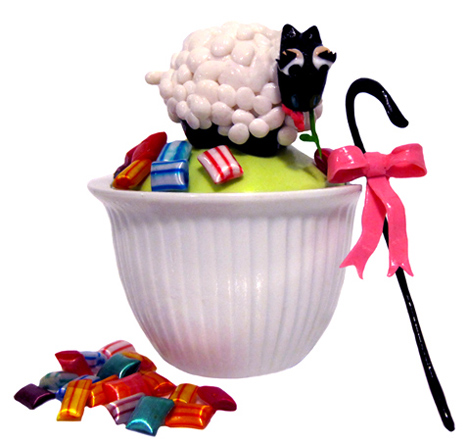
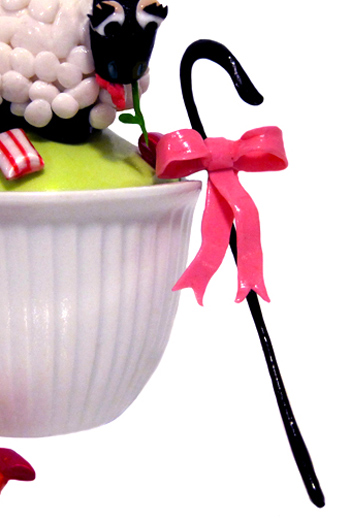
                           little Bo Peep cupcake with steamed fondant finish
    Join me on Facebook

    Been watching 'Cake Boss'? Always wanted to try steaming your fondant but worried your flowers will droop, your bows flop and your bits fall off? It's easier than you think, trays of fondanted cupcakes to your giant tiered creation literally take seconds to steam to that shiny finish you have always desired.
    A quick look at steaming today...

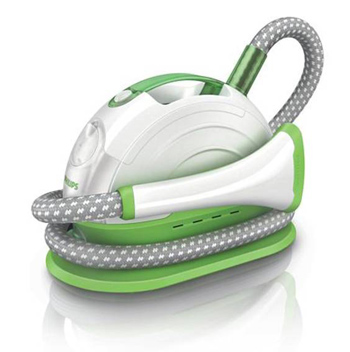
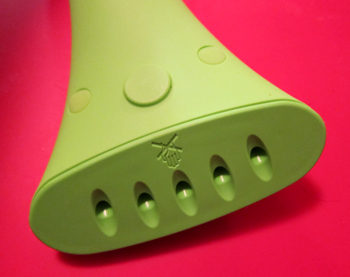
    my portable steamer for cakes... and my clothes when the fibromyalgia prevents me from ironing!

    Firstly, the steamer unit; we are talking "clothing steamers" here, the type you would use to get the wrinkles out of a business shirt or your work jacket. Clothes steamers are either freestanding (like the ones Buddy uses on Cake Boss) or portable like the one I use.

    I use a small portable steamer unit.

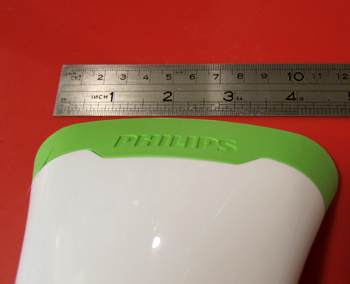
    Make sure your steamer head is clear from any blockage.

    All the steamers work in pretty much the same way; you put water in the tank and turn it on. Make sure your hose isn't tangled and your steamer head is clear from any blockage and you are ready to steam!! You will know it's ready to use when you see steam coming from the head.
    Steam: Not standing too close to your cake and using light sweeping movements, (similar to if you are spraying painting) move your steamer head over your fondanted cake. This only take seconds. You will now have a shiny cake.

    Troubleshoot: 

    You don't want to melt your cake so don't linger on any one spot with the steamer... light sweeping movements only. As you can see on the quick demo cupcake I made, even the finest modelling paste pieces like the bow and crook won't collapse and your lashes/eyes and bit and bobs won't fall off when light steaming has taken place.

    Avoid any risk of water spotting by making sure your hose is not kinked, a kinked hose will lead to a build up of steam and water droplets that will stain your cake. Ditto with the steaming head; blockages lead to water droplets. 

    Practice!! Practice steaming on dummy fondanted cupcakes/cake if it's your first time, it's the best way to get  to know your particular steamer and will save you any heartbreak down the track. 

    Colors intensify/change with steaming. If you are matching a clients fabric sample for example you will need to check the steamed colour change. 

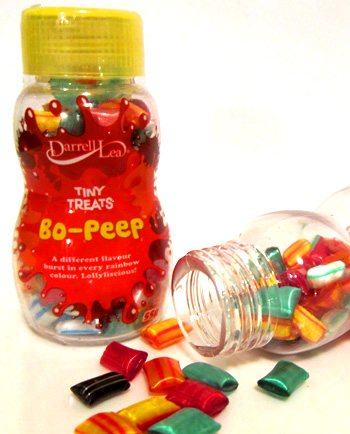
    I've used the cute little boiled lollies on the demo Little Bo Peep Cupcake today to remind you of what the surface of your steamed cake will feel like after steaming; a little bit sticky/tacky. Your cake will fingerprint easily, dust etc will attach to the surface, something to keep in mind if you will be transporting your cake. 

    Isomalt gems, sugar work, boiled lollies and candies are not meant to be steamed, but if your steaming at the venue, the cake is about to be devoured then of course you can steam.

    That about covers it, steamed fondant finishes can look fabulous whether it's shiny, shiny, primary colours or a gentle sheen on ivory.

    Have fun and happy steaming :) 

    Friday
    May112012

    Isomalt sugar drizzled decorations

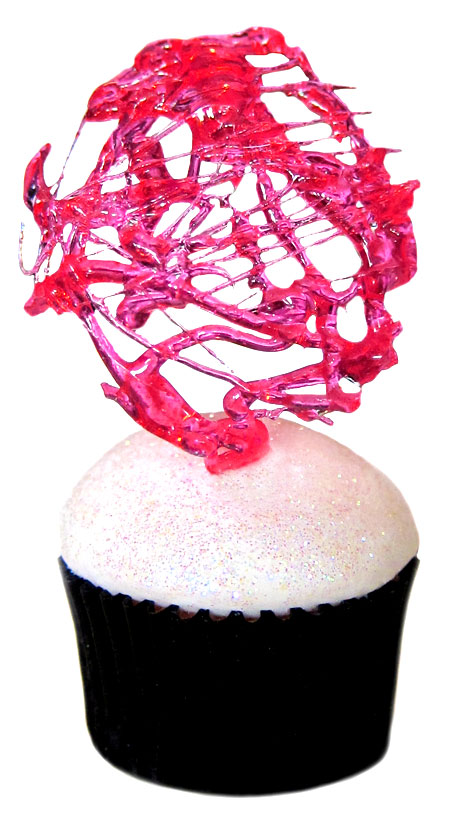
    pink drizzle isomalt decoration tops a mini fondant covered cupcake

    Join me on Facebook

    With a zillion (ok, not quite... but a lot!!) of dessert and cake decorating possibilities "isomalt drizzles" are quick and super easy to make when using precooked isomalt sticks. 

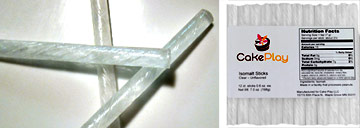
    I used CakePlay's clear isomalt sticks in all today's pieces. The sticks are available in a range of colours, but I prefer colouring the clear isomalt myself. 

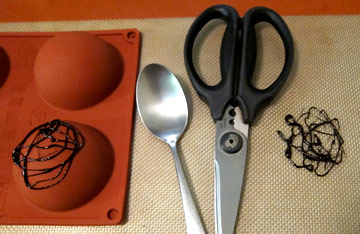
    tools and black isomalt drizzles 

    The only tools you will need are: a spoon, a pair of scissors (oil the blades), a non stick baking mat and a small pyrex or equivalent microwave safe glass jug. 

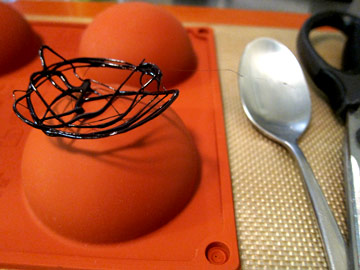
    If you want to shape your pieces, silicone moulds or any food safe heat proof surface like a tin can, the back of a muffin tin etc can be used... though do oil the surface first, isomalt is mighty sticky! 

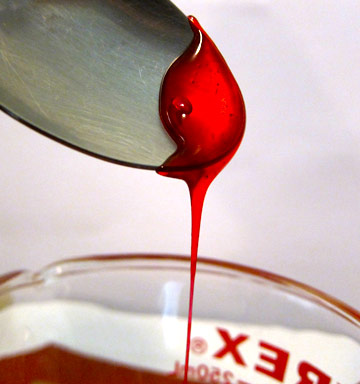
    Pieces of sticks are melted in a microwave safe container, a small pyrex jug is ideal. From there you can add a few drops of food colouring and flavouring if desired, move your spoon gently through the melted isomalt to incorporate colour. Concentrated gel paste colour work best, as you don't want to add to much moisture to the isomalt.

    Gently lift your spoon up and down in the melted isomalt until it thickens slightly and it looks like this....

    try red isomalt drizzles for all your romantic occassions

    Start drizzling!! Drizzle directly onto a non stick baking mat for flat pieces. Drizzle over your oiled mould of choice for shaped pieces or if using silicone you can drizzle directly on the surface. Shaped drizzles hold their shape and you can create baskets or cages with the same method.

    Scissors with oiled blades are used for cutting any errant threads of isomalt and can also be used for trimming/cutting the finished pieces into shapes if desired.


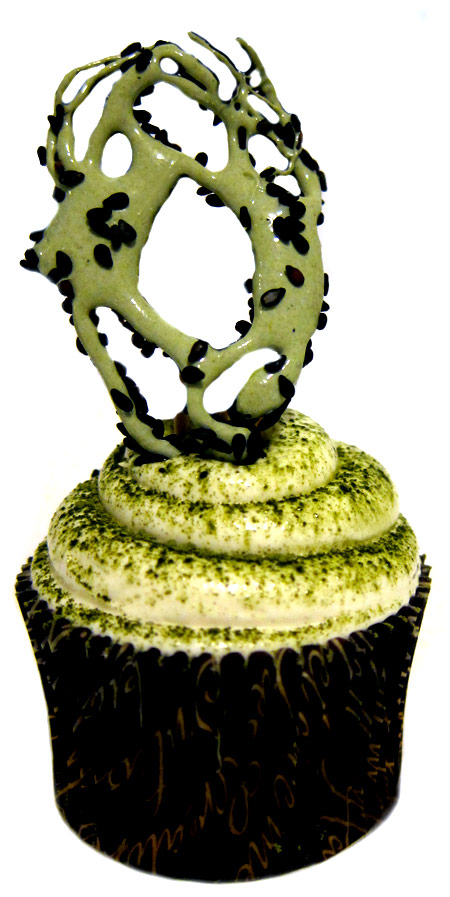
    Japanese Forest Cupcake; offset piping and green tea flavoured black sesame isomalt drizzle to complete the organic look. 

    Solid colour density is achieved by adding a drop or two of white food colouring simultaneously with your colour of choice. For the Japanese forest cupcake I made a slurry of green tea powder and water to add with a drop of white food colouring. Without the addition of "white" the colour is a murky/clear green. 

    If your isomalt hardens before you have finished your drizzles, reheat in 5 second increments in the microwave. Some food colouring shades alter on reheating, for that reason I prefer to work in small multiple batches. 

    To attach isomalt to fondant covered cakes, simply dip the base of your finished drizzle into melted isomalt and attach to your cake... isomalt will set almost instantly giving you a securely attached topper. 

    Isomalt or sugar work pieces are susceptible to moisture and are best used within a few hours. If storage is must, you can try and store the toppers single file in an airtight container with silica sachets... be warned in humid weather you still run the risk of the pieces becoming cloudy.

    Whether you are topping a cupcake or creating a serving basket for you your sorbet, hope you have fun creating isomalt drizzles.

    Happy Baking :)

     *isomalt and sugar and extremely hot when melted, please take extra care when working with either. Remove pets and young children from the room and have a bowl of iced water handy in case of burns. 

    *troubleshoot... "My spoon is in the jug and isomalt has set so I can't microwave"... pop your jug into a bowl, pour boiling water around the jug until isomalt has softened enough to lift out your spoon. 

    *keep your pieces small, thin and easily edible... you don't want broken crowns/dental work spoiling the moment.

    * isomalt sticks are available from cake decorating stores, in Australia I got mine from baking pleasures

       around $15 in Oz or $10 in US for 12 sticks. Also available from Amazon in bulk amounts or single packets 


    You might also be interested in toffee springs

    or perhaps flowers made from Starburst lollies for Mothers Day here


    Monday
    Oct242011

    Blossom Cupcake Toppers

                                 sour cherry cupcake with blossom toppers

    It's raining, it's pouring... it must be Spring in Melbourne!!

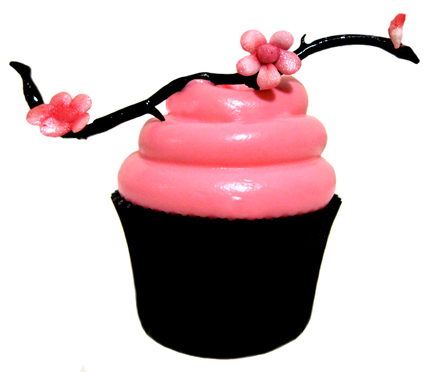
    Today we are making blossom toppers, a little bit fiddly but easy to make. You can go for a natural look or try a more Asian approach with a glossy black finish. 

    You'll need:

    black modelling paste/or black fondant with CMC added

    white modelling paste/or white fondant with CMC added

    leaf flower glaze

    lustre dusts 

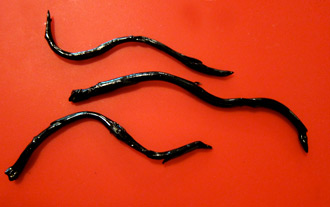
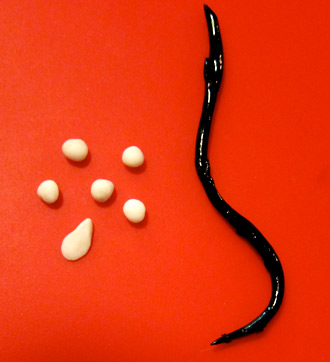
    Roll out small "snake" shapes from the black modelling paste (I've used brown modelling paste in the demo because it was easier to see the steps). With a small pair of sharp scissors cut nicks into the snake shapes, move the shapes to replicate branch shapes. Allow to dry. 

    branch shapes drying

    Once dry paint on leaf/flower glaze with a small brush, allow to dry and repeat. You may need to repeat this step several times until you have a high gloss finish. Allow to dry.

    glazed branches drying

    To make a blossom, roll six small balls of white fondant. Five of the balls will become petals, the sixth the centre of the blossom. Squash a ball lightly with your finger and in forward pulling motion to form a petal. Once you have your petals made, join together by squeezing together the narrow ends with dampened fingers. Add the centre. Repeat until you have desired amount of flowers. Create buds with small balls of modelling paste. Allow to dry. 

    squash a ball lightly in a forward motion to create petals

    Once dry dust the blossoms with lustre dusts of choice, attach the to branches with a small of amount of dampened black modelling paste. Allow to dry before using to top your frosted cupcakes.

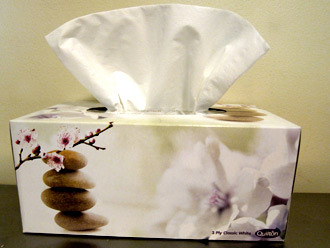
    For those who ask about where do I find "inspiration", it really is all around you... today's toppers were inspired by my kitchen tissue box.

    Happy Baking :)

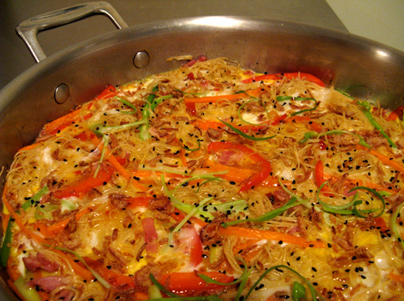
    You might also be interested in Green Tea White Chocolate Cupcakesor go savoury with Bacon and Egg Noodle Omelette 

    Monday
    Sep262011

    Cupcake Cases, Liners, Papers & Wrappers

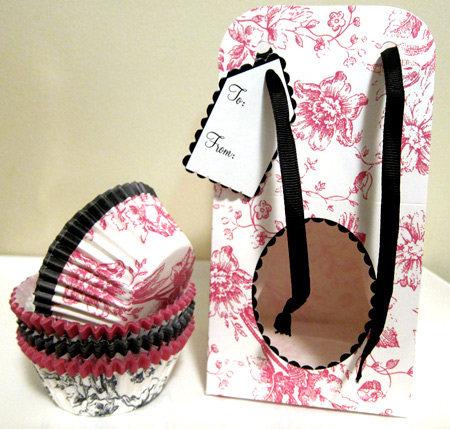
    Cupcake liners can match your theme, act as an inspiration or just be pretty like these pink and black toile cupcake cases by Meri Meri 

    "Pretty Pretty" applies to everything made by Meri Meri the designers and publishers based in the UK and US. Probably most well known for their cupcake kits, Meri Meri also produce an equally beautiful range of paper party-ware to match your theme.

    I love these pink and black toile cases, the paper is medium weight and best used with light coloured cake batters.  Whilst the boxes do hold a single cupcake I think I'll use them to package pink macaron's.  

    Happy Baking :) 

    Cupcake cases only available from Glasshouse Cakes and Supplies (AU)

    Cupcake cases and single and double boxes available from Meri Meri (UK)

    Cupcake cases and boxes available from Amazon (US)


    Thursday
    Sep222011

    Cupcake Cases, Liners, Papers & Wrappers 

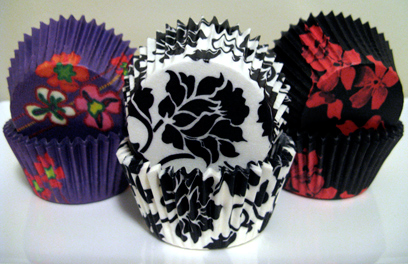
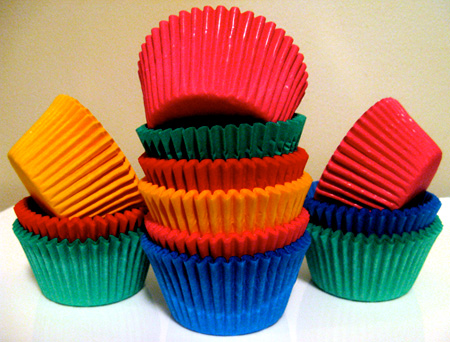
    Cupcake liners can match your theme, just be pretty or act as an inspiration like these two gorgeous cupcake case entries featured today. 

    I'm now on facebook too!

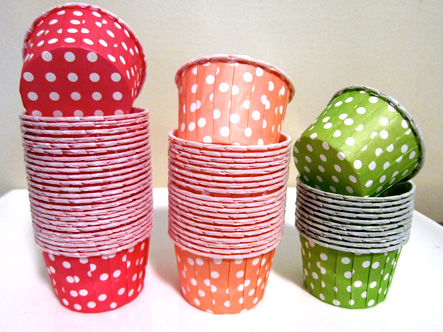
    Ok, these are super cute aren't they? Going dotty with polka dot free-standing cases. These cases can be used for small desserts, ice-cream to hold lollies, nuts or for baking cupcakes. They do have a plastic film interior coating and are made in a wide range of colours to match your theme. 

    Available from The Party Studio (AU) and Bake it Pretty (US) 

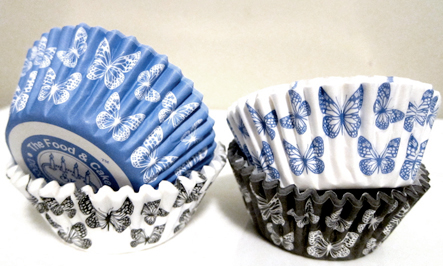
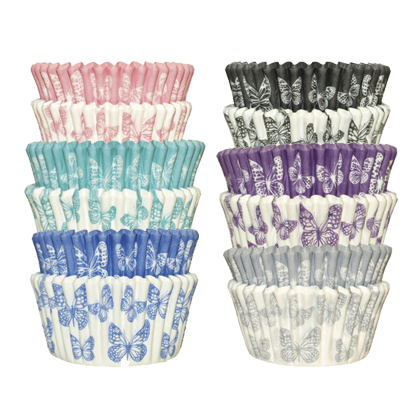
    In case you missed these on facebook... gorgeous SK butterfly cupcake cases.

    Available in a range of colours from Squires Kitchen (UK)

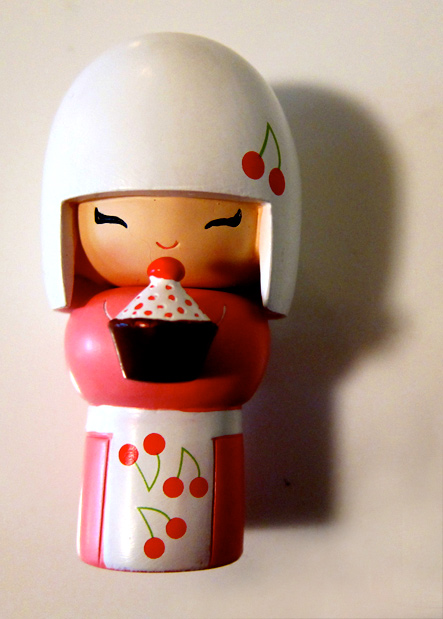
    I have a new "good luck' baking charm in the form of a Momiji doll :)

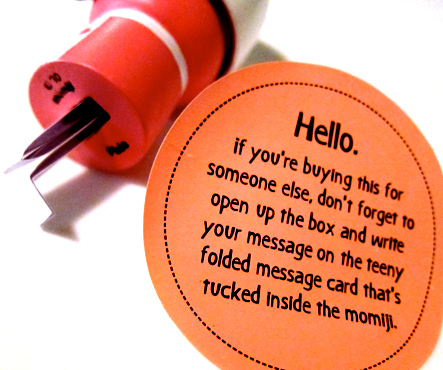
    Momiji (pronounced mom-ee-jee) are collectible hand painted resin message dolls. The adorable dolls are given as small gifts to show friendship and love, each one has a place in the bottom for a hidden message.

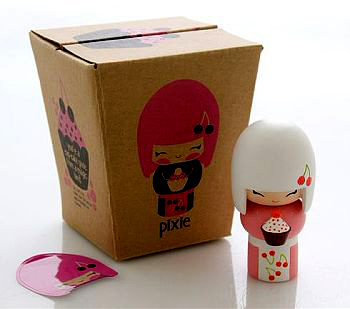
    My Momiji 'Pixie' came packaged in a noodle box and is available from Tesora (AU)  

    and Amazon (US)  

    Happy Baking :)

    you might also be interested in...

    vestli house cupcake cases

    or brights

    Saturday
    Dec042010

    Martha Stewart makes Cookies App Review

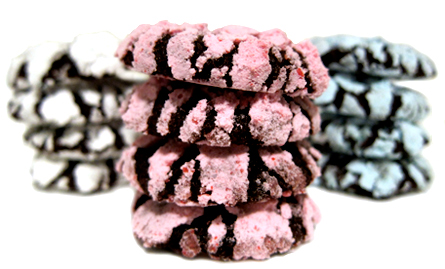
                  variations of Martha Stewart's chocolate crackle cookies


    UPDATE: February 9th.... please note the glitch in the text display with the Martha Stewart make Cookies App has been fixed. Plus more cookie recipes were added with the last update. We can presume at this stage cookies will be added to the app at regular/holiday intervals :) Don't forget to sync your ipad! 

    As a self declared Martha Stewart fan (or insert "fanatic" perhaps?), I just had to get the 'Martha Stewart Makes Cookies' app for ipad! 


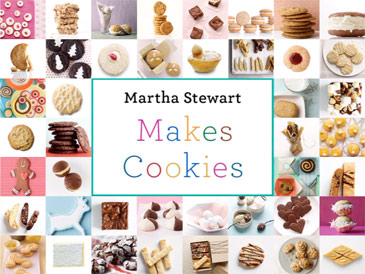
    welcome screen "Martha Stewart Makes Cookies" ipad app

    Pros; well it's "'fun and gorgeous", but I guess you want to hear about the features... 

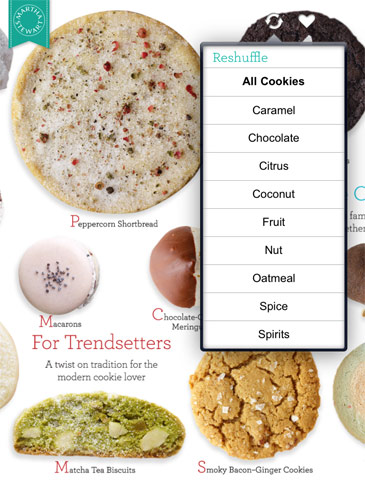
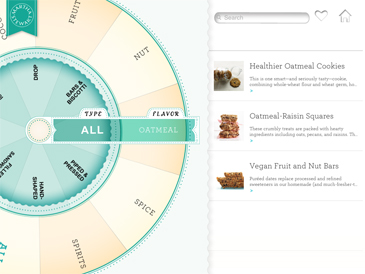
    It's easy to choose any of the cookies with the apps intuitive navigation methods; either scroll sideways through the images and "touch" to make your selection, or use the selection wheel to dial a flavour/type of cookie and of course you can always go old school and type the cookies name or ingredient into the search box.


    scroll sideways then touch to select 


    dial a choice with the selection wheel

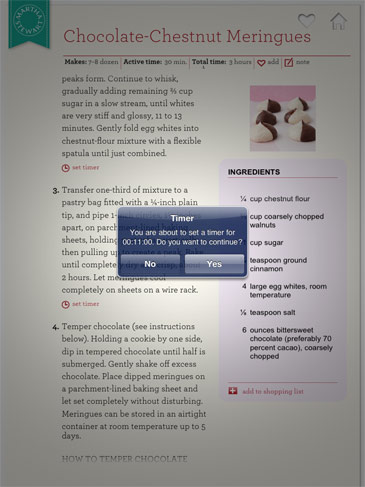
    Helpful pre-set timers are built into the recipes to aid with preparation and baking times.

    setting the timer for 11 minutes for beating meringue

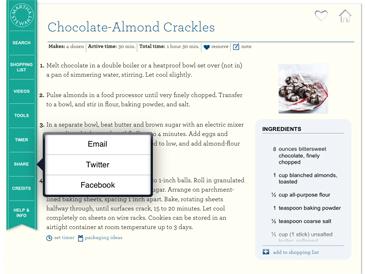
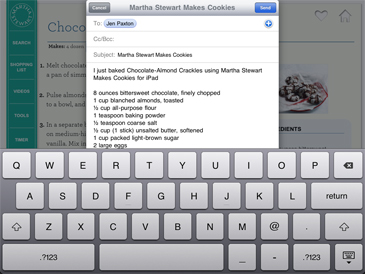
    Ready to share; Loved the recipe you just baked? You can share any recipe through email, Twitter and on Facebook with a touch of a button.

    share a recipe

    emailing a recipe, the full recipe arrives in your inbox complete with small colour image of the cookie.

    Other main features include a dozen short videos showing a cookie being made or technique, shopping list and the ability to bookmark favourites. The new recipes featured and twists on classic recipes are delightful.

    Cons; first up the price at $7.49 (US) or $9.99 (AU) is high for an app. I'd definitely like more packaging ideas (the same two come up over and over again) and more recipes!! If you already own Martha Stewart's Cookies book or are a Martha fan you will find a lot of familiar territory covered; traditional shortbread, sugar cookies, mexican wedding cookies, and yes... biscotti. No metric!!

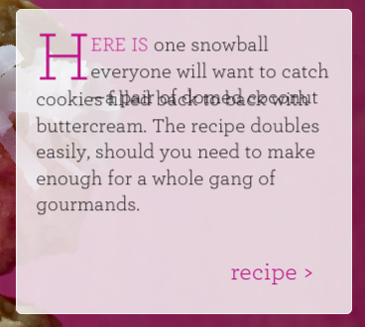
    There is a small programming glitch (that I'm sure that will fixed in an update) that blurs the third line of each cookies intro page. 

    double blur on third line of all the cookie intro pages

    Personally, I'm loving this app for the share and timer abilities, ease of use, the twists on Martha's classic cookies plus the gorgeous photography. This app would suit Martha fans and those ipad carrying people that are new to cookie baking. Whilst there is room for improvement, for a first app it's fantastic and I'm looking forward to future Martha Stewart apps. 


    'Martha Stewart Makes Cookies' app from the iTunes store

    In the 'Martha Stewart Makes Cookies' app you will find a variation of the classic Martha Stewart 'Chocolate Crackle' cookies, this one containing ground almonds... with only a half cup of wheat flour this recipe would be ideal to convert to gluten free.

    Chocolate-Almond Crackles using Martha Stewart Makes Cookies for iPad

    8 ounces (225 grams) bittersweet (dark eating chocolate), finely chopped

    1 cup blanched almonds, toasted

    ½ cup all-purpose flour

    1 teaspoon baking powder

    ½ teaspoon coarse salt

    ½ cup unsalted butter, softened

    1 cup packed light-brown sugar

    2 large eggs

    1 teaspoon pure vanilla extract

    1 cup granulated sugar

    1 cup confectioners’ sugar 

    1 Melt chocolate in a double boiler or a heatproof bowl set over (not in) a pan of simmering water, stirring. Let cool slightly.

    2 Pulse almonds in a food processor until very finely chopped. Transfer to a bowl, and stir in flour, baking powder, and salt.

    3 In a separate bowl, beat butter and brown sugar with an electric mixer on medium-high speed until fluffy, 3 to 4 minutes. Add eggs and vanilla. Mix in chocolate. Reduce speed to low, and add almond-flour mixture. Cover and chill 1 hour.

    4 Preheat oven to 175 celsius (350°). Shape dough into 1-inch balls. Roll in granulated sugar to coat, then in confectioners’ sugar. Arrange on parchment-lined baking sheets, spacing 1 inch apart. Bake, rotating sheets halfway through, until surfaces crack, 15 to 20 minutes. Let cool completely on sheets on wire racks. Cookies can be stored in an airtight container at room temperature up to 3 days.

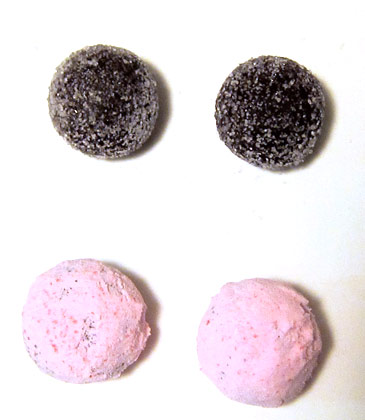
    Coloured Sugar: I made coloured batches of icing sugar by whirling icing sugar and either powdered food colour or gel paste colour in the food processor. You do get tiny dots of intense colour with both powder or gel. I wanted them to match the flavour variations I had planned....

    I made one batch of these Chocolate-almond Crackle cookies and rolled them in white icing sugar.
    Then I made a batch of the traditional Chocolate Crackle cookies from Martha Stewart's website. I divided that dough in half adding a 1/2 cup of chopped dried blueberries to one half (rolled in blue) and 2 teaspoons of raspberry liqueur to the other half to be rolled in the pink.

    *note if you are using the recipe for Chocolate Crackle cookies from Martha's website there is one step missing that is included in the cookie book. Roll your cookie dough balls in granulated/white sugar before rolling in icing sugar... this step ensures a pristine finish for when you need to package your cookies as gifts.

    Happy Baking :)

    you might also like Martha's Baking Handbook review

    today's main photo Daniel Paxton-Zahra

    Friday
    Aug202010

    Mini MasterChef Jam Donuts

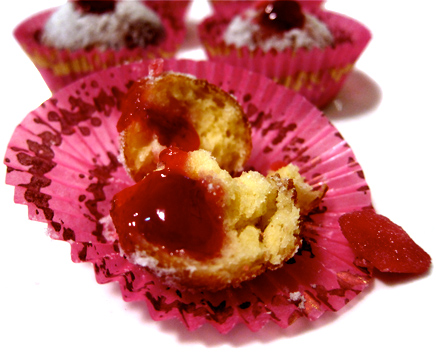
                       mini donuts, with plum jam and rose sugar


    doughnut |ˌdəʊnʌt| (also donut)

    noun

    a small fried cake of sweetened dough, typically in the shape of a ball or ring.

    Hmmm, today I tried the jam donut recipe that Gary made during a MasterChef MasterClass episode. Well, they are definitely light and fluffy and they taste divine but are they doughnuts?? 

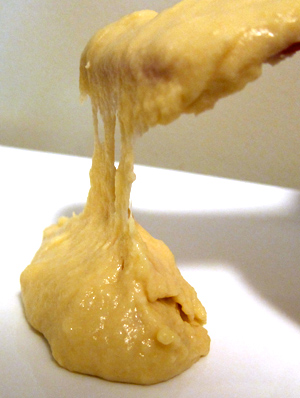
    The batter is more of a yeasted fritter, they taste a bit like deep fried brioche; which in itself is not a bad thing but I'm not sure without the jam and the sugar coating you would be thinking "doughnut flavour". 

    However, whether your a donut aficionado or a donut newbie this recipe is worth trying. Not as sure about the shaping method which involves grabbing a handful of batter and squeezing off nuggets into the dry fryer, I used spoons! The donuts have a darker exterior than a standard donut due to the larger than usual dairy/sugar ratio in the batter. 

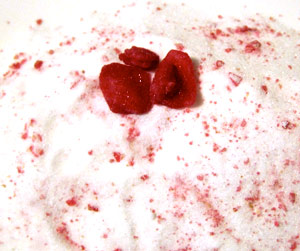
    I didn't have access to fresh lavender (it's still winter here) so I ground crystallised rose petals to flavour the coating sugar. I also changed the jam to plum jam, otherwise what follows is the MasterChef recipe...

    Ingredients

    440ml (15 fluid oz) milk 
    100g (3.5 oz)  unsalted butter, softened
    75g (2.6 oz) caster sugar (superfine)
    4 eggs
    20g (0.7 oz) fresh yeast (or half that amount if using dried yeast)
    4 cups plain flour (all-purpose)
    Vegetable oil, for deep frying
    200g (7 oz) raspberry jam (I used red plum jam)
    clotted cream, to serve

    Sugar Coating

    2 tsp lavender flowers (I replaced lavender with 1 tablespoon of ground crystallised rose petals)
    100g caster sugar (superfine)

    Step 1: Heat milk in a saucepan until tepid (37°C [98F] on a thermometer). Whisk in the butter, caster sugar and eggs. Place the yeast into a bowl and about ½ cup of the milk mixture. Break up the yeast with your hands to form a smooth paste. Transfer to the milk mixture, whisking to combine. Combine flour and ½ teaspoon of salt in a large bowl and make a well in the centre. Gradually pour in the milk mixture, whisking until smooth. Cover and set aside in a warm place to prove for 45 minutes - 1 hour.

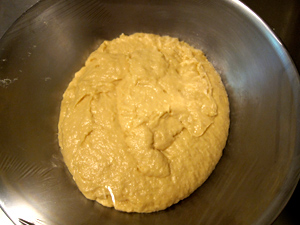
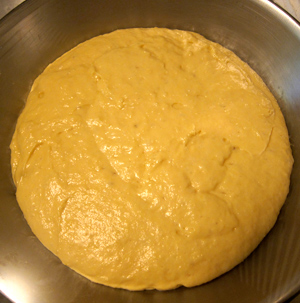
    dough has more of a fritter consistency

    cover dough and set aside in a warm place

    dough risen and ready to use


    Step 2: Meanwhile, for the lavender sugar, combine lavender flowers with sugar in a large bowl, rub together with your hands until flowers are bruised. Set aside for 15-20 minutes to infuse.

    ground rose with sugar infusing

    Step 3: Pour oil into a saucepan until one-third full. Heat over medium-high heat until 165°C. Spoon donut mixture into 4cm round balls into the hot oil. Cook for 3-4 minutes until golden and cooked through. Remove, drain on paper towel, then toss in the lavender sugar.

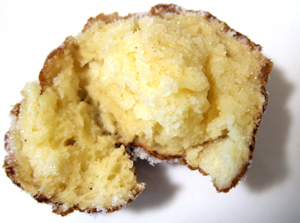
    light and fluffy interior


    Step 4: Spoon jam in a small piping bag with a 5mm straight-edged nozzle. Push nozzle into the centre of each donut and pipe enough jam to fill.

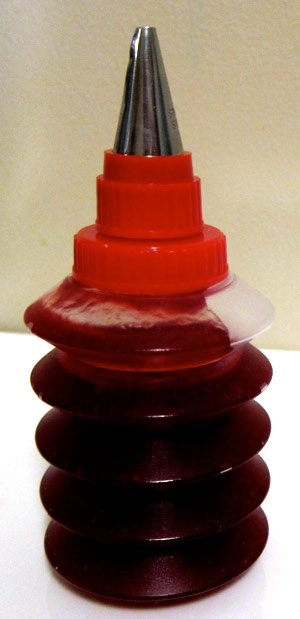
    I used a squeezy cookie decorating bottle to insert the jam


    Step 5: Serve donuts with clotted cream. 

    Whether you serve them with clotted cream, in small cases or even tossed in a brown paper bag to eat in front of the TV they're a yummy treat the whole family will enjoy.

    Be sure to check out the official MasterChef site for the top rating Australian cooking reality show... I particularly love the Gary and George MasterClass recipes. 

    Happy Baking or should that be frying? :)

    You might also be interested in;

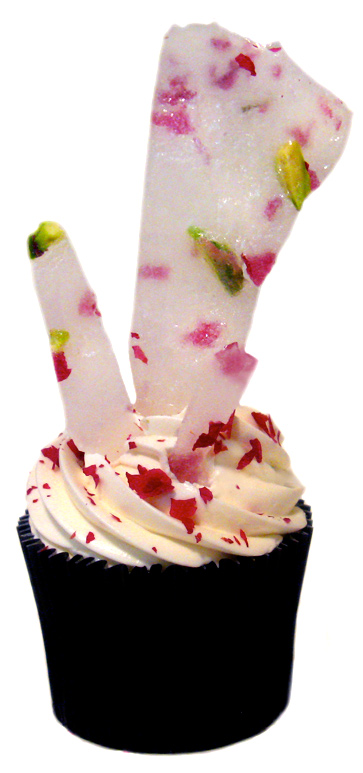
          Roses in food 

    Thursday
    Aug122010

    Beetroot Chocolate "Yes!", Beetroot Cookies "No!"

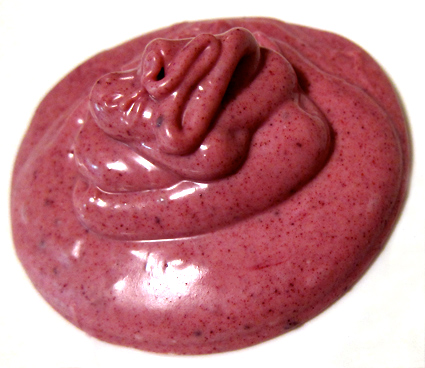
    white chocolate coloured & flavoured with dried beetroot (beet) powder

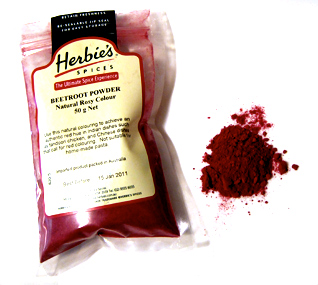
    Using beetroot powder is great way to naturally colour your icings, frostings and is one of my favourite flavourings for white chocolate. White chocolate flavoured with beetroot has a sweet flavour, slight berry notes and a touch of tingly acidity. The pretty natural speckled colour will add another dimension to your chocolate curls, twirls and shapes. 

    Using beetroot powder in white chocolate;

    stir in 1 teaspoon of sifted beetroot powder for every 100g (3.5oz) of tempered white chocolate. 

    Alas, beetroot powder doesn't work for colouring your cakes and cookies. The powder is highly susceptible to changes in pH levels, when exposed to pH levels above 7 the colour quickly fades to tan/yellowish brown.


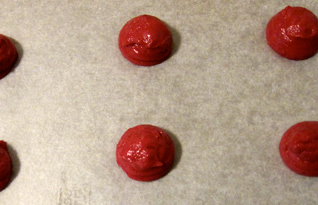
    Before; the gorgeously coloured beetroot butter cookie batter

    After; the combined oven temperature and raising agent (baking powder) fade the colour dramatically

    Soooo, even though you won't be whipping a red velvet cake with your beetroot powder; you can produce deliciously different chocolate, fabulous frostings and fun confectionaries like coconut ice without having to reach for that bottle of red food colouring. 

    Beetroot powder is available is health food stores, selected grocery stores and chef supply stores. 

    Happy Baking :)

    You might also be interested in;

                            Red food colouring

    Thursday
    May272010

    Happy Birthday Cindy!!

    dark chocolate birthday cupcake

    I have been friends with Cindy since high school and I have proof ;) Here is our high school photo taken *cough *splutter 31 years ago.

    class photo

             Cindy class photo

                      Me class photo

    Life long friends, we live in neighbouring suburbs and Daniel went to high school with Cindy's kids. I love Cindy, she is an amazing friend and an amazing person. Happy Birthday Cindy!!! Hope you are having a lovely day!

    I wanted a cake that would have been served 30+ years ago & a chocolate frosted cream filled layer cake came to mind, it is what my mum made for me... from a packet mix, bless her heart baking wasn't her forte.

    For the "birthday candle" on the cake I wrapped fondant around a toothpick, the toothpick then goes through the cake to secure the layers. For the flame I used a little yellow & red fondant, attached to candle & glazed with cake glaze. For the minature layer cake I used a 4cm (1.6inch) cutter to cut the centre from another cupcake, split, frosted and filled as per usual. 

    Happy Baking :)