Navigation
SEARCH
This form does not yet contain any fields.

    Entries in isomalt (5)

    Friday
    May112012

    Isomalt sugar drizzled decorations

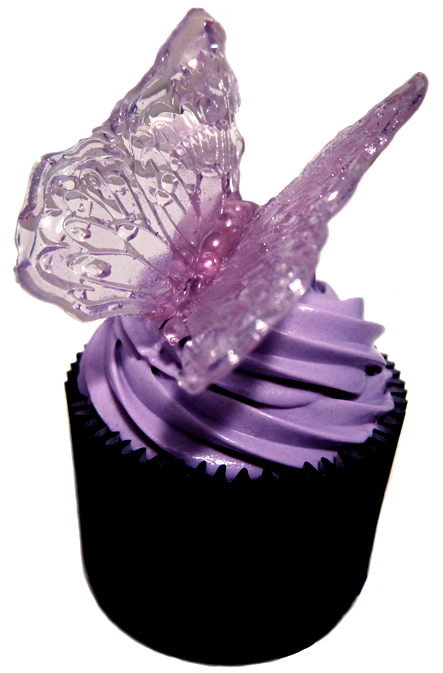
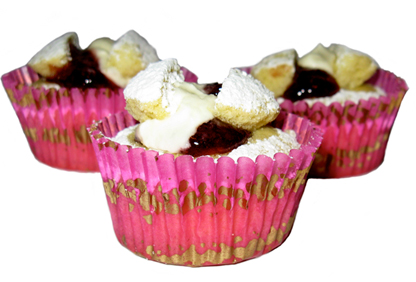
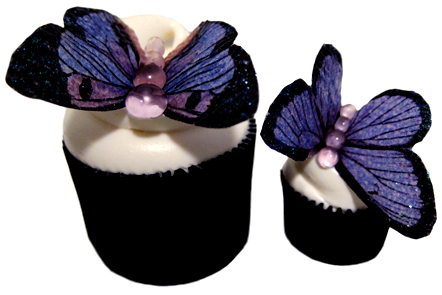
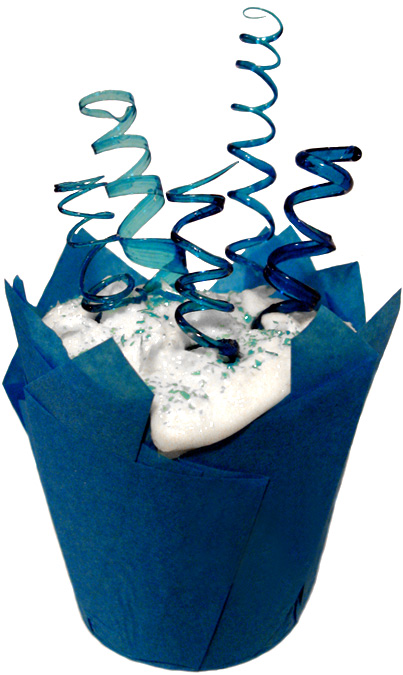
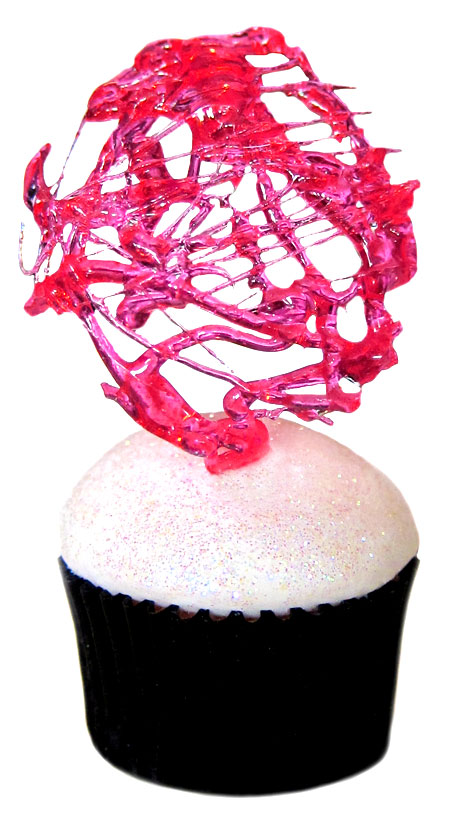
    pink drizzle isomalt decoration tops a mini fondant covered cupcake

    Join me on Facebook

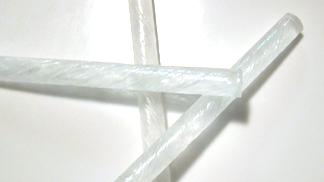
    With a zillion (ok, not quite... but a lot!!) of dessert and cake decorating possibilities "isomalt drizzles" are quick and super easy to make when using precooked isomalt sticks. 

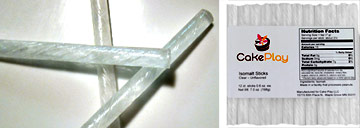
    I used CakePlay's clear isomalt sticks in all today's pieces. The sticks are available in a range of colours, but I prefer colouring the clear isomalt myself. 

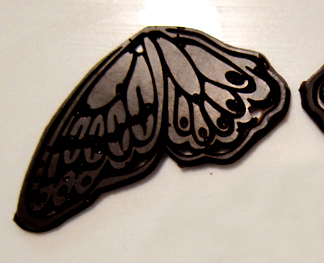
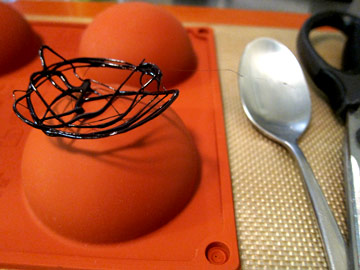
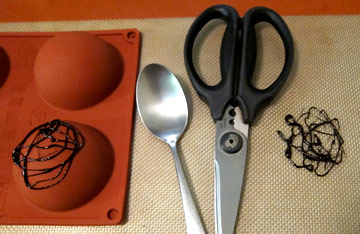
    tools and black isomalt drizzles 

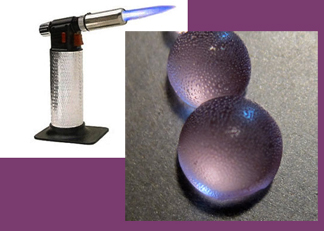
    The only tools you will need are: a spoon, a pair of scissors (oil the blades), a non stick baking mat and a small pyrex or equivalent microwave safe glass jug. 

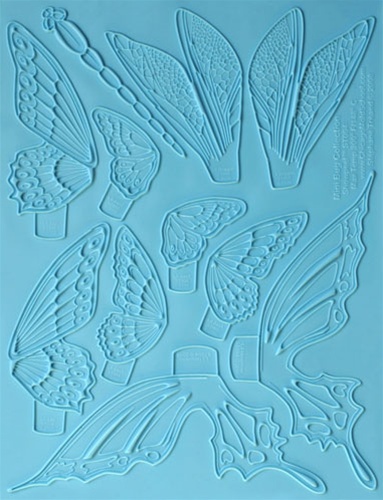
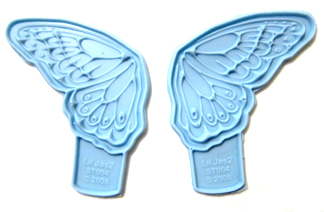
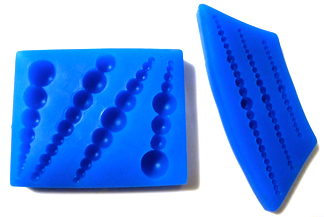
    If you want to shape your pieces, silicone moulds or any food safe heat proof surface like a tin can, the back of a muffin tin etc can be used... though do oil the surface first, isomalt is mighty sticky! 

    Pieces of sticks are melted in a microwave safe container, a small pyrex jug is ideal. From there you can add a few drops of food colouring and flavouring if desired, move your spoon gently through the melted isomalt to incorporate colour. Concentrated gel paste colour work best, as you don't want to add to much moisture to the isomalt.

    Gently lift your spoon up and down in the melted isomalt until it thickens slightly and it looks like this....

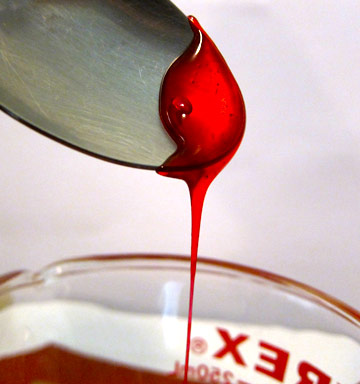
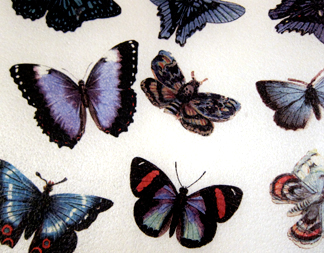
    try red isomalt drizzles for all your romantic occassions

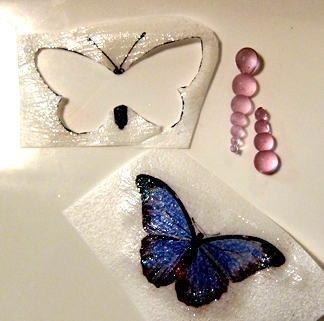
    Start drizzling!! Drizzle directly onto a non stick baking mat for flat pieces. Drizzle over your oiled mould of choice for shaped pieces or if using silicone you can drizzle directly on the surface. Shaped drizzles hold their shape and you can create baskets or cages with the same method.

    Scissors with oiled blades are used for cutting any errant threads of isomalt and can also be used for trimming/cutting the finished pieces into shapes if desired.


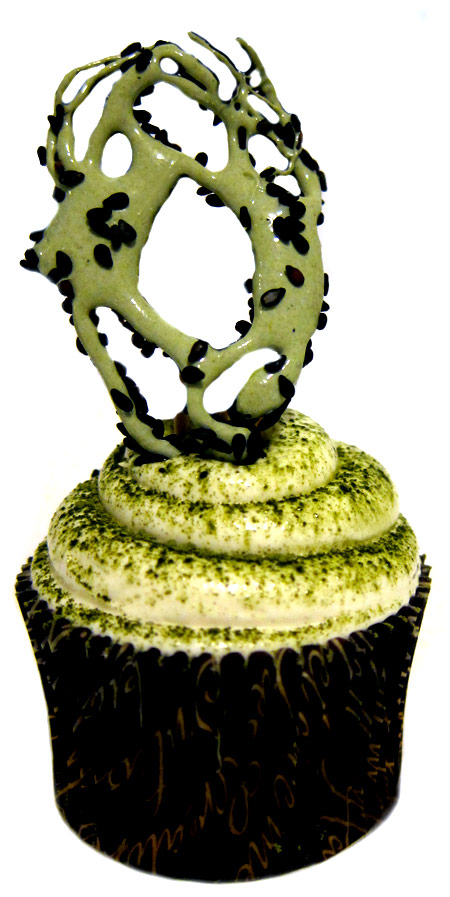
    Japanese Forest Cupcake; offset piping and green tea flavoured black sesame isomalt drizzle to complete the organic look. 

    Solid colour density is achieved by adding a drop or two of white food colouring simultaneously with your colour of choice. For the Japanese forest cupcake I made a slurry of green tea powder and water to add with a drop of white food colouring. Without the addition of "white" the colour is a murky/clear green. 

    If your isomalt hardens before you have finished your drizzles, reheat in 5 second increments in the microwave. Some food colouring shades alter on reheating, for that reason I prefer to work in small multiple batches. 

    To attach isomalt to fondant covered cakes, simply dip the base of your finished drizzle into melted isomalt and attach to your cake... isomalt will set almost instantly giving you a securely attached topper. 

    Isomalt or sugar work pieces are susceptible to moisture and are best used within a few hours. If storage is must, you can try and store the toppers single file in an airtight container with silica sachets... be warned in humid weather you still run the risk of the pieces becoming cloudy.

    Whether you are topping a cupcake or creating a serving basket for you your sorbet, hope you have fun creating isomalt drizzles.

    Happy Baking :)

     *isomalt and sugar and extremely hot when melted, please take extra care when working with either. Remove pets and young children from the room and have a bowl of iced water handy in case of burns. 

    *troubleshoot... "My spoon is in the jug and isomalt has set so I can't microwave"... pop your jug into a bowl, pour boiling water around the jug until isomalt has softened enough to lift out your spoon. 

    *keep your pieces small, thin and easily edible... you don't want broken crowns/dental work spoiling the moment.

    * isomalt sticks are available from cake decorating stores, in Australia I got mine from baking pleasures

       around $15 in Oz or $10 in US for 12 sticks. Also available from Amazon in bulk amounts or single packets 


    You might also be interested in toffee springs

    or perhaps flowers made from Starburst lollies for Mothers Day here
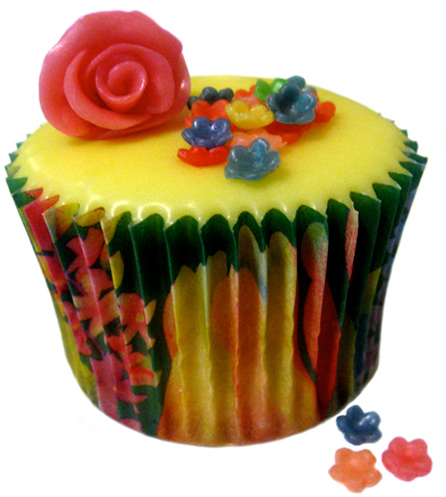
     

    Friday
    Oct282011

    Seahorse cupcake and bubbles in silicone moulds

                                         seahorse cupcake

    Join me on Facebook

    Goodness, sorry I'm sooo behind in answering mail... I'm answering one today, and I can hear many saying "about time!!!". It's a question about using a gas torch to remove the bubbles created in pieces of isomalt when you are using silicone moulds. 

    hi, I tried to use a butane torch like you did on the butterflies on my isomalt pieces but I couldn't get rid of the all the bubbles and created a melted mess. What am I doing wrong? 

    Vicki

    Hi, Vicki you didn't say what moulds you were using but I presume it's something small or with finer detail? I thought I do an example piece today to illustrate... 

    An isomalt seahorse straight from the silicone mould. Tiny air bubbles cover the surface of the piece. 

    To remove the air bubbles wave the flame of a chef's gas torch over the surface of the piece.

    You can see in this shot I'm part way through torching, I've lost a little of the detail but not much. The fin of the seahorse is thin, I give it another quick flash of flame but I won't keep going to remove all the bubbles as I would be risking melting the piece. 

    Note the photo on top of page, I photograhed in front of white card so you can see how there still is few small areas of bubbles. However to the naked eye they are difficult to see. 

    Finally, my torch is very small it is possible your torch is more powerful? If that is the case, perhaps invest in a small chefs torch as they are relatively inexpensive nowadays. Hope this helps you Vicki.

    Happy Baking :)

    You might also be interested in Sugar Glass Butterflies 

    Friday
    Sep162011

    Sugar Glass Butterfly Cupcake and Showpeels


                                             sugar glass butterfly cupcake

    Don't you love when chefs make those giant sugar display pieces, just like in the excellent documentary 'Kings of Pastry'? Sugar pieces that are destined to be displayed in grand ball rooms and events around the world can recreated on a smaller scale with the help of silicone showpeels. 

    Showpeels are embossed thin silicone sheets that allow you to make the most intricate isomalt or chocolate pieces. A mulitude of large showpeels are available but today I'm using one of the two mini types available... 'Mini Bug Collection'.

    Four different butterflies and one dragon fly are on the showpeel. You simply cut out each one with a craft knife/mat or small sharp scissors.

    I used the smallest butterfly today. 

    If you wish to recreate today's butterfly you will need;

    Mini Bug Showpeel

    First Impressions drop pearl mould

    candy thermometer

    gas chef's torch to remove bubbles

    *heat resistant gloves (sugar gloves)

    Ingredients 

    1 cup of isomalt 

    optional 4 tablespoons of water (if the weather is humid don't use any water) 

    food colour (I use gel)

    Method 

    Turn your oven onto a very low temperature, (this is too keep the isomalt liquid between butterflies) you could also use the type of heating pad that keeps your casserole warm. If your isomalt does set too firmly it can be gently reheated on the stove top.

    Combine isomalt and water in a heavy based saucepan over medium heat, stir until combined with a metal spoon. Brush down side with a dampened pastry brush if necessary. Cook until isomalt reaches 160 C  (320 F). Remove from stove, whilst still bubbling add a few drops of food colour and stir in a gentle backwards and forwards motion to incorporate colour. 

    Now your ready to make butterflies!! Watch Pastry Chef Stéphane Tréand to see the technique.

    Make a butterfly body using drop pearl mould. Butterflies because they are so thin only take a few minutes to set, the bodies take about 7-10 minutes to cool fully. You will need to keep your isomalt warm between butterflies. Silicone moulds leave bubbles on the surface, for a shiny finish flash briefly with a chefs gas torch... see more on this in this weeks 'beaded butterfly cupcakes' entry.

    Attach wings to body with dabs of isomalt. 

    Handle you butterflies by the edges or wear cotton gloves, sugar work like chocolate will fingerprint.

    Store butterflies in an airtight container without touching, add silicone sachets to adsorb moisture. Isomalt butterflies like isomalt gems are at the mercy of the elements and will go cloudy with moisture, they can be lightly brushed with flavourless oil to restore shine or use "cloudy" for a frosted finish. 

    I'm loving using Showpeels, they are costly but think of them as investment; particularly if you are a cake decorator by trade or just have to have that large butterfly atop your daughters wedding cake. 

    Showpeels can be used for chocolate work too and are available from Chicago Mold School

    Happy Baking :)

    *Sugar gloves won't let you dive into hot isomalt, but they do offer splash protection. I did burn myself making these, totally my fault; I didn't put my gloves on and wasn't paying enough attention. Sugar and Isomalt are extremely hot when cooked, please cook with care and remove pets and small children from the work area. 


     You might also be interested 'Debbie's Beaded Butterflies'

    or perhaps a batch of Raspberry Jam to fill your butterfly cakes

    Wednesday
    Sep142011

    Debbie's Beaded Butterfly Cupcakes

                                       Debbie's  beaded butterfly cupcakes 

    Typing one handed today as I'm sporting a "butterfly injury" after dipping my hand in hot isomalt... not something I'd recommend!!! Luckily I do listen to Martha Stewart and had a bowl of cold water nearby to dip my hand in, phew judging by all the blistering it's lucky I did! 

    But bravery is my middle name (not really I cried like a baby) and I piped with one hand to finish off my cakes for today. 

    Purple butterfly cupcakes for Debbie, who is my step son Daniel's Mum :)

    Beaded Butterfly toppers

    You will need...

    rice paper butterfly printed sheet (available from cake decorating stores)

    silicone bead or drop pearl moulds (mine 'pearl drops' by First Impressions)

    isomalt sticks or pearls

    clear cake piping gel

    cake glue

    edible glitter

    food colour of choice 

    chef's gas torch

    small sharp scissors or craft knife

    paint brush used for food purposes only


    I made two batches of cakes yesterday, both used isomalt in the toppers. I was burnt with the cooked stove top isomalt (that cake later in the week) and I also used for the first time isomalt sticks. 

    Isomalt sticks are pre cooked isomalt, if it's first time you're using isomalt or you rarely do sugar work they are good option. However if you are frequent user I recommend cooking your isomalt from either powder or crystals.

    Quick and easy to prepare the stick isomalt;

    Break desired amount of sticks into pieces and place them in a microwave safe cup with a handle (I used pyrex) Melt in 15 second increments until clear and bubbles have formed. That's it, done!!

    Remove from the microwave and add colour if desired, stir the colour in with a back and forwards waving motion to prevent bubbles forming. Once all bubbles have subsided, pour carefully (it's hot!!) into moulds. 

    Allow to set and then unmould.

    If you used a silicone mould you will have small bubbles on the surface of your pieces.

    A quick pass over with a gas chef's torch will remove the bubbles and leave you with shiny pieces. If your moulded pieces are too long for the butterflies body, snap a piece off to shorten and neaten the end with the gas torch.

    Butterfly Wings;

    Lightly paint over selected butterflies with cake gel, sprinkle with edible glitter if desired. Leave overnight to dry.

    Next morning with small sharp scissors or a craft knife on a craft mat, cut out the butterflies. I cut the body ends away too.

    Gently fold butterfly and attach isomalt body with a little cake glue. Leave to dry for a few hours, support the wings by putting folded paper etc under them to create a "flying position". 

    Use finished butterflies to top you cupcakes. 

    Happy Baking or Butterfly making :) 

    Saturday
    Aug282010

    Last post and Isomalt bubble sugar 

    diamonds are forever cupcake by the lone baker, brick paving by the husband of the lone baker

    Thank you, thank you, thank you!!! To all the people that have visited the lone baker blog over the past nine months. I've had so much fun bringing you cupcakes, tips & more, but as my husband Mark ventures out into opening his own landscaping business 'Mark Paxton Landscapes' it's his time to shine and our time to support him. Diamonds are forever, but my break from blogging won't be; I'll be back in 12 months with a newly designed blog and fabulous cupcakes! Until then "Happy Baking" :) But wait... there is final post below for a quick and easy bubble sugar technique. 

    Love the look of bubble sugar but the thought of pouring hot toffee down an angled alcohol coated tray fills you with dread? There is another way; isomalt bubble sugar is quick and easy to make with virtually no clean up. Bubble sugar made with isomalt keeps well compared to standard sugar work and will not become "sticky" for up to three weeks at coolish room temperature. 

    You will need two silpats (or equivalent) baking mats & isomalt powder or granules. If you would like coloured bubble sugar you will need powdered food colouring too.

    isomalt is a sugar substitute derived from beetroot (beets)

    Preheat oven to 200C (400F) 

    Method

    Place one silpat onto a baking tray, sprinkle an even layer of isomalt on the silpat. If you are using food colour sprinkle the colour as evenly as possible onto the isomalt or sprinkle various colours for rainbow bubble sugar. Reverse the second silpat and place it on the top of isomalt layer. 

    two silpats sandwich the isomalt layer

    Bake for 10 minutes, remove baking tray from oven and set aside to cool.

    paper thin bubble sugar

    Once cool lift off the top silpat and the isomalt will have melted to produce bubble sugar that you can now break or cut into shards for your decorating use. 

    Happy baking :)

    *Quickest way to get your baking questions answered... post them on my Facebook page