Navigation
SEARCH
This form does not yet contain any fields.

    Entries in "Mark Paxton Landscapes" (5)

    Saturday
    Oct222011

    Peach Verrine in minutes

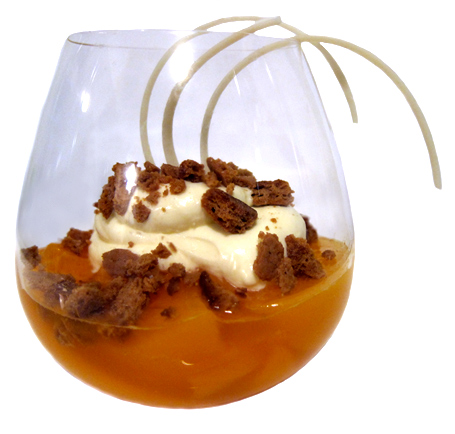
               stem-less red wine glass holds a Peach Verrine

    verrine is a confection, originally from France, made by layering ingredients in a small glass. It can be either sweet or savoury, making a dessert or snack. Wikipedia

    Join me on Facebook

    Goodness, sometimes you just have one of "those weeks!!" A week when the faithful Apple Mac computer broke down, the puppy discovered it can rip stuffing from every chair and our new landscaping business 'Mark Paxton Landscapes' has taken off with a pre-Christmas frenzy of work. A week where there was no baking going on ):

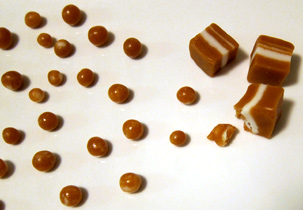
    Time to raid the pantry to see what I can whip up in the 5 minutes I have to spare!! Tinned peaches (in mango puree), ginger nut biscuits (cookies), Peach Schnapps and white chocolate curls. Ok, now to the fridge, whipping cream and mascarpone... it must be time for a verrines! 

    There is no amounts for this recipe, just start by putting chilled peach slices in the bottom of your glasses. Whip some cream (sweeten to taste), fold through a few spoonfuls of mascarpone and add a glug of Peach Schnapps. Top the peaches with a spoonful of the cream mixture, add crumbled gingernut biscuits (cookies) and chocolate curls. Serve immediately.

    For verrines in minutes; think fruit, crunch, cream and chocolate.

    You do have that jar of pitted morello cherries lurking in the pantry somewhere don't you? Divide the cherries between glasses. Top the fruit with a kirsch cream mixture, crushed chocolate biscuits (cookies) and dark chocolate curls. 

    So remember when you having one of "those weeks", there is always time for dessert!!

    You might also be interested in Combed Chocolate Curls

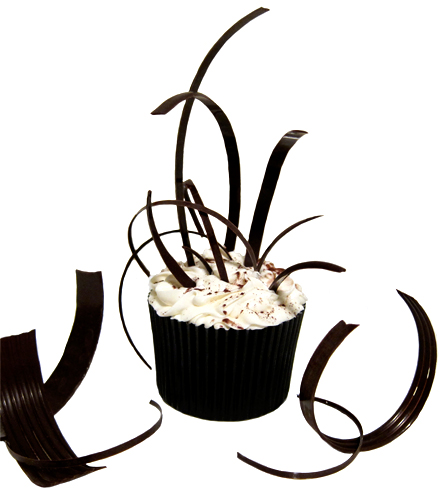
    or a quick Toblerone dessert
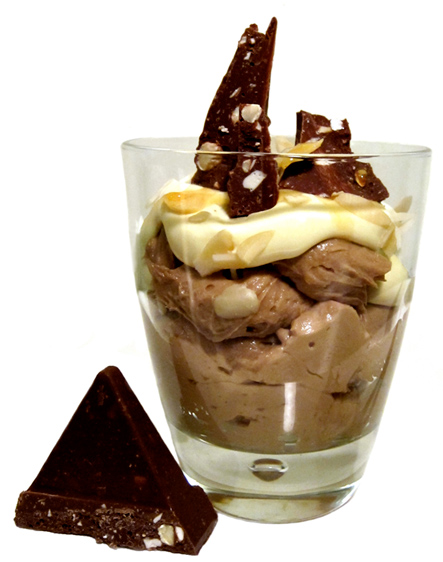
    Wednesday
    Feb092011

    Like a Jane Austen Character...

    Sometimes your best effort just isn't enough...

    As late as this afternoon I was fully intending to work on a cocoa story & corresponding cupcake... it was "the walk" that changed all that. I went for a ten minute walk with my husband tonight, four hours later & I still haven't "recovered"; not that a short walk should need a recovery period... guess that's the point, the fibromyalgia is worsening & getting relief from the pain is becoming nigh on impossible.

    I won't be able to keep up this blog and work on the set up of my husbands (our) landscaping business 'Mark Paxton Landscapes' at the same time. Terribly sad as I love blogging (& baking!!). It's been a bit up and down whether I could keep blogging part time, but I'm heading towards a fibromyalgia "crash" (ok, might already have reached that destination) & have to take care of my health first. Like a character from Jane Austen I think I'm going to have retire to my bed chamber for a few chapters.

    I'll be back in July/August, hopefully feeling a lot better....... but for now.... thank you all for you support.  Happy Baking :) 

    Wednesday
    Feb022011

    100 cupcakes


                                           100 cupcakes

    You may or may not know that I'm only posting sporadically for the first year of my husbands new landscape gardening business. 

    We are still in the set up stage and as you can imagine we are in a swirl of PAPERWORK!!! Sooo I'll be spending my time sorting out a few of the envitable problems that have arisen and won't be blogging for a week.

    But for now it's "Yay!" I've reached "100 cupcakes"!!!

    Good grief there is a few in the group I regret, (lol, take heart fondant modelling skills do improve with each one you do!!) and there is a few I just love.... for a closer look check out my Flickr cupcake photostream.

    Personal highlights of my first 100 cupcakes include being featured on 'Cupcakes Take the Cake' on numerous occasions. I adore 'Cupcakes Take the Cake', each time they have chosen one of my cakes I have been thrilled.

    As featured on Cupcakes Take the Cake:

    Christmas tree Cupcake

    Chocolate Valentine's Cupcake

    Bubble Wrap Chocolate Cupcake Toppers

    I bet you've never seen a cupcake quite like this before: Moose on Mouse Cupcake

    5 extra fabulous cupcakes by The Lone Baker

    Interviewed by the beautiful Hani of Haniela's

    Quoted by the MatadorNetwork the worlds top independent travel magazine Wasabi, Bugs & Musk: 15 Strange Candies from around the world.

    I've also been featured on other fabulous sites including; Party Frosting, Edible Crafts/Craft Gossip, Party Cupcake Ideas, The Cupcake Blog & All Things Cupcake

    Looking forward to cupcake 101 late next week!

    Happy Baking :)

    Wednesday
    Dec152010

    Frosty the Snowman Cookie

      Frosty the Snowman Christmas cookie; fondant, jersey caramel and coconut top a chocolate sugar cookie

    Frosty the snowman was a jolly happy soul,
    With a corncob pipe and a button nose
    And two eyes made out of coal.
    Frosty the snowman is a fairy tale, they say,
    He was made of snow but the children
    Know how he came to life one day.
    There must have been some magic in that
    Old silk hat they found.
    For when they placed it on his head
    He began to dance around.
    O, Frosty the snowman
    Was alive as he could be,
    And the children say he could laugh
    And play just the same as you and me.

    A touch of retro today with a 'Frosty the Snowman' cookie... a present for my husband Mark who has been grumbling about "you never make a snowman". Mark does love a snowman, I'm sure something to do with the fact that he has never actually seen snow!!

    To keep with the retro theme Frosty's round tummy & the snowballs are made from a Mark's favourite childhood lolly 'Jersey Caramels'. With a fudge like texture it was easy to shape and roll into small balls, I dipped the balls in melted white chocolate and rolled them in desiccated coconut to form the snowballs.

       jersey caramels being rolled into snowballs

    I am feeling the time pinch and it's just about my last post for the year. For those who haven't seen my earlier posts; for the first seven months of 2011 I'll be assisting my husband setting up his landscaping business 'Mark Paxton Landscapes' and will only be able to blog sporadically. I'm sure there will be months in that time frame where I'll be able to do more and times when I won't, like "June" tax time!! 

    But for now "Happy Baking" :)

    Saturday
    Aug282010

    Last post and Isomalt bubble sugar 

    diamonds are forever cupcake by the lone baker, brick paving by the husband of the lone baker

    Thank you, thank you, thank you!!! To all the people that have visited the lone baker blog over the past nine months. I've had so much fun bringing you cupcakes, tips & more, but as my husband Mark ventures out into opening his own landscaping business 'Mark Paxton Landscapes' it's his time to shine and our time to support him. Diamonds are forever, but my break from blogging won't be; I'll be back in 12 months with a newly designed blog and fabulous cupcakes! Until then "Happy Baking" :) But wait... there is final post below for a quick and easy bubble sugar technique. 

    Love the look of bubble sugar but the thought of pouring hot toffee down an angled alcohol coated tray fills you with dread? There is another way; isomalt bubble sugar is quick and easy to make with virtually no clean up. Bubble sugar made with isomalt keeps well compared to standard sugar work and will not become "sticky" for up to three weeks at coolish room temperature. 

    You will need two silpats (or equivalent) baking mats & isomalt powder or granules. If you would like coloured bubble sugar you will need powdered food colouring too.

    isomalt is a sugar substitute derived from beetroot (beets)

    Preheat oven to 200C (400F) 

    Method

    Place one silpat onto a baking tray, sprinkle an even layer of isomalt on the silpat. If you are using food colour sprinkle the colour as evenly as possible onto the isomalt or sprinkle various colours for rainbow bubble sugar. Reverse the second silpat and place it on the top of isomalt layer. 

    two silpats sandwich the isomalt layer

    Bake for 10 minutes, remove baking tray from oven and set aside to cool.

    paper thin bubble sugar

    Once cool lift off the top silpat and the isomalt will have melted to produce bubble sugar that you can now break or cut into shards for your decorating use. 

    Happy baking :)

    *Quickest way to get your baking questions answered... post them on my Facebook page