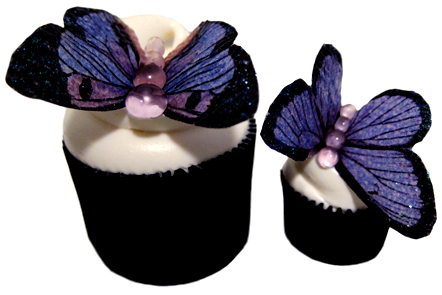
Debbie's Beaded Butterfly Cupcakes
 Debbie's beaded butterfly cupcakes
Typing one handed today as I'm sporting a "butterfly injury" after dipping my hand in hot isomalt... not something I'd recommend!!! Luckily I do listen to Martha Stewart and had a bowl of cold water nearby to dip my hand in, phew judging by all the blistering it's lucky I did!
But bravery is my middle name (not really I cried like a baby) and I piped with one hand to finish off my cakes for today.
Purple butterfly cupcakes for Debbie, who is my step son Daniel's Mum :)
Beaded Butterfly toppers
You will need...
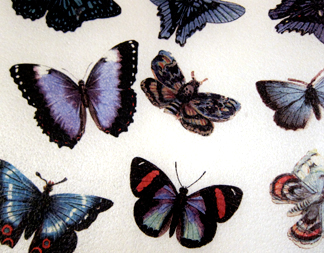 rice paper butterfly printed sheet (available from cake decorating stores)
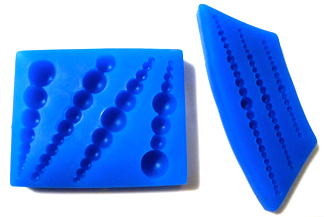 silicone bead or drop pearl moulds (mine 'pearl drops' by First Impressions)
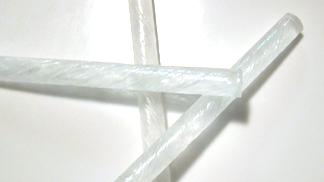 isomalt sticks or pearls
clear cake piping gel
cake glue
edible glitter
food colour of choice
chef's gas torch
small sharp scissors or craft knife
paint brush used for food purposes only
I made two batches of cakes yesterday, both used isomalt in the toppers. I was burnt with the cooked stove top isomalt (that cake later in the week) and I also used for the first time isomalt sticks.
Isomalt sticks are pre cooked isomalt, if it's first time you're using isomalt or you rarely do sugar work they are good option. However if you are frequent user I recommend cooking your isomalt from either powder or crystals.
Quick and easy to prepare the stick isomalt;
Break desired amount of sticks into pieces and place them in a microwave safe cup with a handle (I used pyrex) Melt in 15 second increments until clear and bubbles have formed. That's it, done!!
Remove from the microwave and add colour if desired, stir the colour in with a back and forwards waving motion to prevent bubbles forming. Once all bubbles have subsided, pour carefully (it's hot!!) into moulds.
Allow to set and then unmould.
If you used a silicone mould you will have small bubbles on the surface of your pieces.
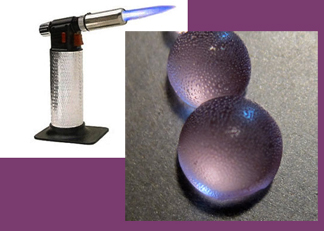
A quick pass over with a gas chef's torch will remove the bubbles and leave you with shiny pieces. If your moulded pieces are too long for the butterflies body, snap a piece off to shorten and neaten the end with the gas torch.
Butterfly Wings;
Lightly paint over selected butterflies with cake gel, sprinkle with edible glitter if desired. Leave overnight to dry.
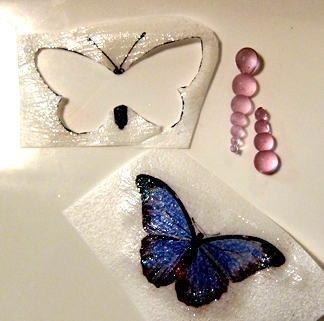
Next morning with small sharp scissors or a craft knife on a craft mat, cut out the butterflies. I cut the body ends away too.
Gently fold butterfly and attach isomalt body with a little cake glue. Leave to dry for a few hours, support the wings by putting folded paper etc under them to create a "flying position".
Use finished butterflies to top you cupcakes.
Happy Baking or Butterfly making :)
 The Lone Baker


