Navigation
SEARCH
This form does not yet contain any fields.

    Entries in cupcake (71)

    Friday
    Oct142011

    White Chocolate Plastique (Modelling Chocolate


    white chocolate plastique rose, dusted with gold lustre dust

    Today I have an easy and excellent icing sugar (confectioners sugar) based white chocolate plastique for you to try. With no cooking involved you can whip this up in minutes, ready to create flowers or figures. This plastique can also be added to your precoloured fondant.

    White Chocolate Plastique (Modelling Chocolate)

    suitable for modelling figures and flowers, not for covering cakes. 

    Ingredients

    25g (0.88oz)white chocolate (I used couverture) 

    100g (3.5oz) icing sugar (confectioners sugar)

    75g (2.65oz) cocoa butter

    100g (3.5oz) glucose syrup

    Method

    In the bowl of a food processor combine the first three ingredients, until well blended. Add the glucose syrup and blend. Depending how warm your kitchen is, you will now have a ball of mixture or coarse breadcrumb like mixture... either way, tip contents onto non stick mat and knead until smooth and elastic. *Your chocolate plastique is now ready to use. 

    Uses

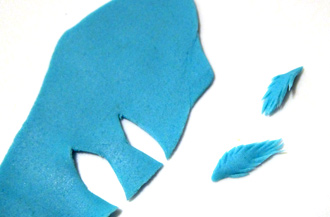
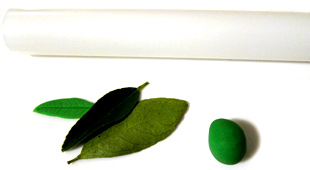
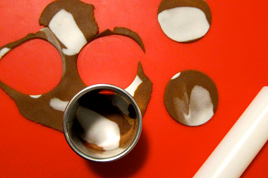
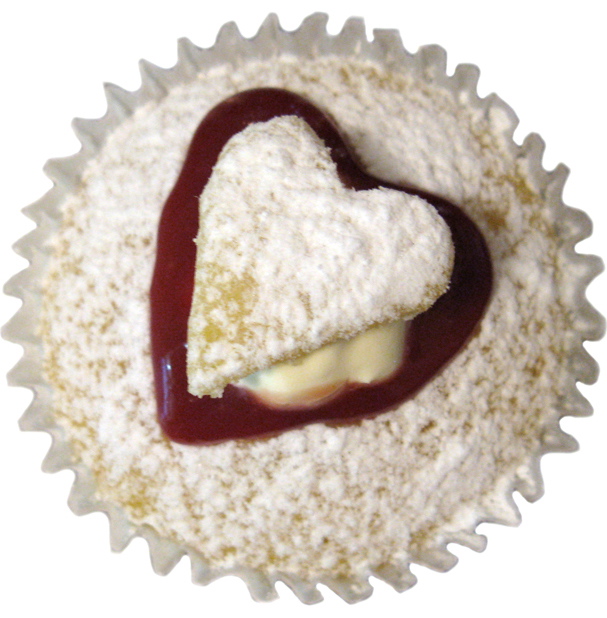
    The chocolate plastique can be rolled paper thin, perfect for petals.

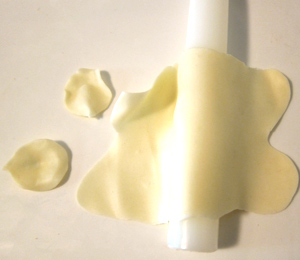
    roll paper thin with a plastic rolling pin

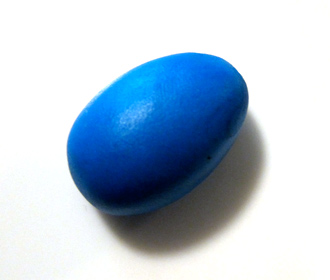
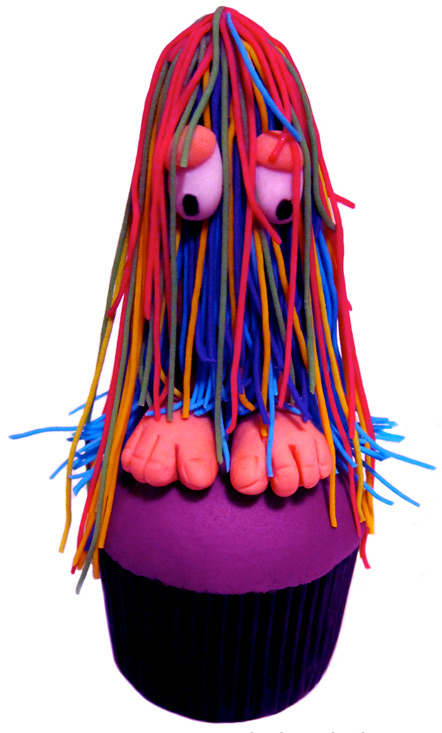
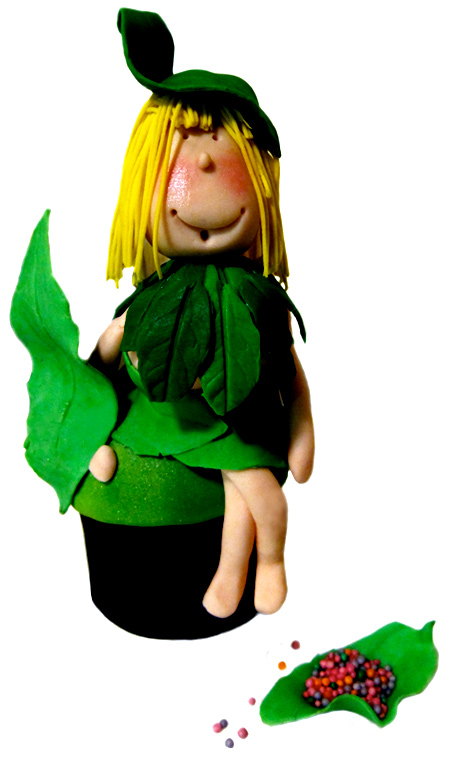
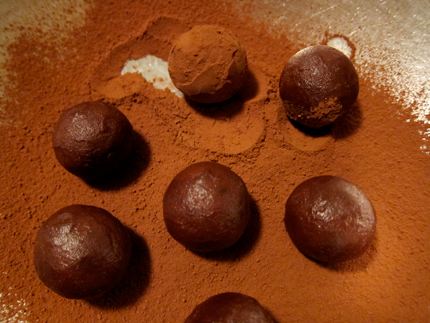
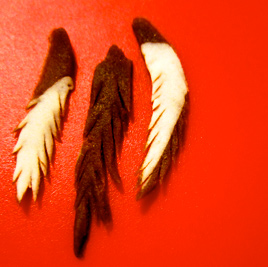
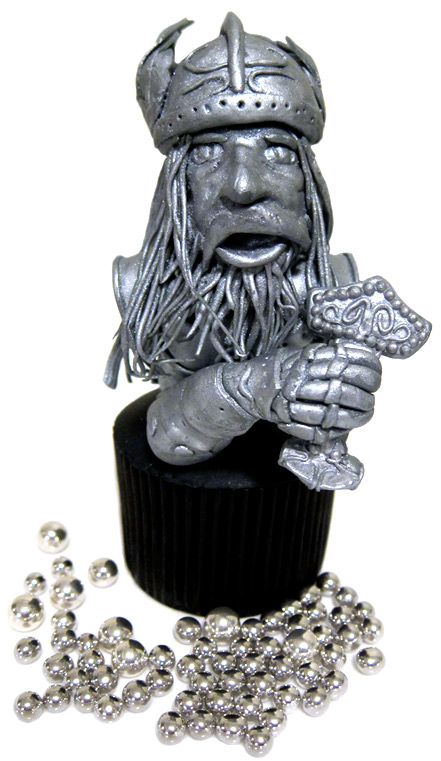
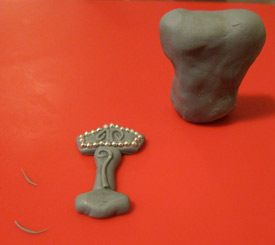
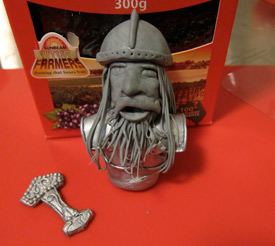
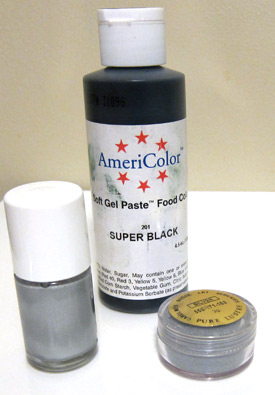
    Use it to create figures. Knead in food colours as desired.

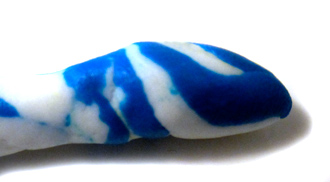
    Mixing half and half with pre-coloured modelling/flower paste will give you the flexibility of the plastique combined with the strength of the paste. Depth of colour is easily reached by over tinting your modelling paste before knead together with plastique. 50/50 is the ratio I usually use, however in hot weather I use 70 modelling paste/30 plastique. 

    Storage

    Keep leftover chocolate plastique well wrapped in plastic wrap and in an airtight container.

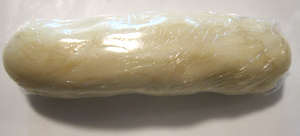
    *Troubleshoot: if you have hot hands, your plastique might seperate a little... just leave to one side for 10 minutes & then try kneading again. A few minutes of refrigeration can also help.

    Glucose syrup if you haven't used it before is extremely sticky, have a scrapper on hand if any adheres to the inside of your bowl to make sure you get it all out and incorporated into plastique. 

    Happy Baking :)

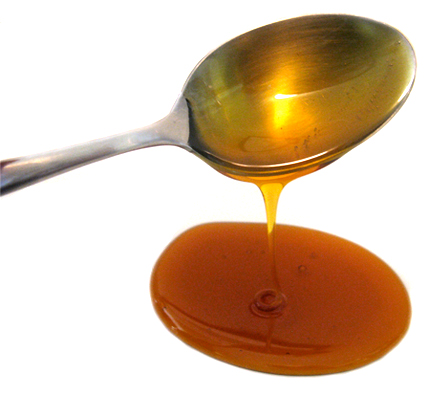
    You might also be interested in liquid sweeteners and syrups

    Sunday
    Oct022011

    Baby Blue Birds of Happiness Cupcake

                                    baby blue birds of happiness cupcake

    The Bluebird of Happiness; It is a widely accepted symbol of cheerfulness, happiness, prosperity, hearth and home, good health, new births, the renewal of springtime, etc. Virtually any positive sentiments may be attached to the bluebird.

    blue bird of happiness wikipedia

    Join me on Facebook, I'd love to see you there! 

    "Egg birds" a quick little fondant bird that you can pop in a nest. Today it's bluebirds, though I also make white versions of these birds with a closed beak and an added comb for Easter chickens. 

    Start by rolling small egg shapes out of blue fondant. 

    Then roll out modelling paste/flower paste in different shades of blue. With small scissors (I have two pairs of nail scissors in my cake dec kit, one pair curved and one straight) cut feather shapes for the wings. Make incisions in each feather shape to mimic a real feather. Attach three feathers to each side of your birds with water or cake/flower glue. 

    Roll a small amount of white fondant into balls for the eyes and attach. Shape a small amounts of orange fondant or modelling paste into beaks and attach. Allow to dry for a few hours before drawing black dots on the eyes with a food marker. My egg birds don't have feet, but of course you could add them if desired.

    For the nest, using a clay gun extrude brown/chocolate fondant or modelling paste with the finest hair disc. Shape sections into nests, keeping a few single strands to one side. Allow to dry for a few hours before attaching to the top of your cakes with cake glue. Tuck in pieces of your reserved strands to create a "twiggy" nest look.

    Put a small rolled round (dampened both sides) piece of fondant inside the nest, position your birds in the nest. Allow to dry for a few hours. 

    Oh, and if you would like to make marbled fondant it's very easy, just twist together your desired amount of colours. The more you twist, the more muted the colours will become. Roll out.

    Happy Baking :)

    You might also be interested in all the shapes a clay gun can make!!

    Dippy Hippy and Clay Gun Shapes

    Thursday
    Sep292011

    Menopause Fairy Cupcake

                                                     menopause fairy cupcake


    Join me on facebook

    Where are the middle aged fairies? All faires seems to be young, nubile and so perfectly pretty... then we jump to the elderly fairy godmother. What happens in between? One of my girlfriends suggested "perhaps they just aren't seen". Oh, that is a sad thought... so if you know a fairy or a woman between 45 and 55 make sure they are "seen" today!! 

    I've always loved the fairies that the fabulous cake decorator Dot Klerck of 'Eat Cake Party' makes; today's "Menopause Fairy Cupcake" is a spin on Dot's design. To see the talented Dot's fairies and the rest of her amazing cakes check out her flickr photostream.

    I used fresh lime leaves to create the fondant leaves

    Don't have leaf cutters or leaf veining moulds? In a pinch you can roll your fondant or modelling paste onto the back of a food safe, unsprayed leaf. Washed and dried mature leaves work best. Place a small ball of fondant on the back of the leave, roll lightly over it with a rolling pin. Peel off the fondant leaf, trim if necessary and drape over rolling pin or spoon to create shape, leave to dry.

    Happy Baking :)

    You might also like Eric the Emu 

    Tuesday
    Sep202011

    "Weep now or Never more" cupcake

                                        weep now or never more cupcake

    Ah, broken is the golden bowl! the spirit flown forever!
    Let the bell toll! -a saintly soul floats on the Stygian river - 
    And, Guy De Vere, hast thou no tear? -weep now or never more!
    See! on yon drear and rigid bier low lies thy love, Lenore!
    Come! let the burial rite be read -the funeral song be sung! - 
    An anthem for the queenliest dead that ever died so young - 
    A dirge for her, the doubly dead in that she died so young.

    first stanza 'Lenore' Edgar Allan Poe

    Join me on Facebook

    My Nan was the cutest elderly woman who also had a penchant for horror stories, with a particular fondness of anything by Edgar Allan Poe. With Halloween just around the corner (or should that be "dark corner"?) my thoughts were of Poe and a quick cupcake pick technique that can be used for any occasion.

    Give your guests a small take home token in the form of a cupcake pick. Today I'm using miniature skeleton cameos for Halloween but it could be any charm, token or small costume jewellery piece to suit your occasion.

    Tiny Cameos 1.9cm x 1.27cm  (3/4 by 1/2 inch)

    Take your cameo or charm and colour a toothpick with food colour to match your theme. Attach a the toothpick (cut the toothpick if it's too long for your charm) to the cameo with a small piece of black fondant. Leave to dry overnight. 

    attach toothpick with black fondant

    Place picks in prepared cupcakes. The fondant is easily broken away leaving your guest with a reminder of the event. 

    Oh, a tip on black icing whether it's the glace icing I used to ice today's mini cupcakes or fondant... start with chocolate icing that way you won't have to use anywhere near as much black food colour as you would if you started with white. 

    Happy Baking :) 

    Sweet skeleton day of dead cameo charm with oxidised silver frame from Silver Crow Creations (US)

    You might also be interested in Gothic Cockroach Cupcakes

    Friday
    Sep162011

    Sugar Glass Butterfly Cupcake and Showpeels


                                             sugar glass butterfly cupcake

    Don't you love when chefs make those giant sugar display pieces, just like in the excellent documentary 'Kings of Pastry'? Sugar pieces that are destined to be displayed in grand ball rooms and events around the world can recreated on a smaller scale with the help of silicone showpeels. 

    Showpeels are embossed thin silicone sheets that allow you to make the most intricate isomalt or chocolate pieces. A mulitude of large showpeels are available but today I'm using one of the two mini types available... 'Mini Bug Collection'.

    Four different butterflies and one dragon fly are on the showpeel. You simply cut out each one with a craft knife/mat or small sharp scissors.

    I used the smallest butterfly today. 

    If you wish to recreate today's butterfly you will need;

    Mini Bug Showpeel

    First Impressions drop pearl mould

    candy thermometer

    gas chef's torch to remove bubbles

    *heat resistant gloves (sugar gloves)

    Ingredients 

    1 cup of isomalt 

    optional 4 tablespoons of water (if the weather is humid don't use any water) 

    food colour (I use gel)

    Method 

    Turn your oven onto a very low temperature, (this is too keep the isomalt liquid between butterflies) you could also use the type of heating pad that keeps your casserole warm. If your isomalt does set too firmly it can be gently reheated on the stove top.

    Combine isomalt and water in a heavy based saucepan over medium heat, stir until combined with a metal spoon. Brush down side with a dampened pastry brush if necessary. Cook until isomalt reaches 160 C  (320 F). Remove from stove, whilst still bubbling add a few drops of food colour and stir in a gentle backwards and forwards motion to incorporate colour. 

    Now your ready to make butterflies!! Watch Pastry Chef Stéphane Tréand to see the technique.

    Make a butterfly body using drop pearl mould. Butterflies because they are so thin only take a few minutes to set, the bodies take about 7-10 minutes to cool fully. You will need to keep your isomalt warm between butterflies. Silicone moulds leave bubbles on the surface, for a shiny finish flash briefly with a chefs gas torch... see more on this in this weeks 'beaded butterfly cupcakes' entry.

    Attach wings to body with dabs of isomalt. 

    Handle you butterflies by the edges or wear cotton gloves, sugar work like chocolate will fingerprint.

    Store butterflies in an airtight container without touching, add silicone sachets to adsorb moisture. Isomalt butterflies like isomalt gems are at the mercy of the elements and will go cloudy with moisture, they can be lightly brushed with flavourless oil to restore shine or use "cloudy" for a frosted finish. 

    I'm loving using Showpeels, they are costly but think of them as investment; particularly if you are a cake decorator by trade or just have to have that large butterfly atop your daughters wedding cake. 

    Showpeels can be used for chocolate work too and are available from Chicago Mold School

    Happy Baking :)

    *Sugar gloves won't let you dive into hot isomalt, but they do offer splash protection. I did burn myself making these, totally my fault; I didn't put my gloves on and wasn't paying enough attention. Sugar and Isomalt are extremely hot when cooked, please cook with care and remove pets and small children from the work area. 


     You might also be interested 'Debbie's Beaded Butterflies'

    or perhaps a batch of Raspberry Jam to fill your butterfly cakes

    Friday
    Sep022011

    Love Caramel Cupcake

                               love caramel apple spice cupcake

    Missing my Mum who passed away seven years ago this weekend :( 

    Mum loved everything "caramel", one of my first food memories is being allowed to have a piece of Cadbury Caramello chocolate. 

    Stroopwafels the Dutch waffle treats are available in most Australian supermarkets. The thin waffle batter is filled with caramel. They can be quiet firm in texture and Mum like to put them over her cup of steaming coffee to soften the caramel to it's full gooey sticky potential. 

    To make stroopwafel cupcake picks use a small cookie/aspic cutter and cut desired shapes. If it's cold weather (or your stroopwafels are past their prime... but hope it's not that!) it might be necessary to soften each waffle in the microwave on low for a few seconds.

    Thread your shapes onto a toothpick. Pop them into your frosted cupcake.

    Pull out of your cake for a bonus treat or if no one is looking try dipping them in your coffee :)

    Apple Spice Cupcakes

    makes 12 cupcakes

    Preheat oven to 180C (350F)

    12 hole cupcake pan lined with paper liners

    Ingredients

    1 1/2 cups plain (all-purpose) flour

    1 1/2 tsp baking powder

    1/2 tsp cinnamon

    1/2 tsp mixed spice (pie spice)

    1 1/4 cups sugar

    1/2 cup butter, room temperature

    2 eggs. room temperature

    1 tsp vanilla extract/essence

    1/2 cup tart apple peeled, cored and cut into small dice

    3/4 cup milk

    Method

    Place flour, baking powder and spices in a small bowl, stir with a fork. 

    In a large bowl of an electric mixer with paddle attached, beat together butter and sugar until combined. Add eggs one at time, beating until incorporated after each addition. Beat in vanilla. Alternatively *beat in fllour and milk, starting and ending with flour. Stir through apple.

    Divide the batter into the 12 holes of prepared pan. 

    Bake 25 to 29 minutes or until light golden brown and the cupackes spring back when gently touched. 

    Remove from oven and cool for 5 minutes before removing cakes to cooling rack to cool. Frost once cooled.

    *when beating in the flour, beat until just incorporated... over beating at this stage develops the gluten leading to a tough cupcake.


    Martha Stewarts Caramel Buttercream

    Halloween 2004, October Holiday 2004 

    makes 5 cups

    Optional: I added a four drops of a combination caramel flavour/colouring to recreate the caramel taste and colour my Mum liked.this confectionery flavour/colour from Roberts Confectionary Australia

    I could not think of a better buttercream caramel frosting than Martha Stewarts Caramel Buttercream.

    Ingredients

    • 1 1/4 cups sugar
    • 1/3 cup heavy cream
    • 6 large egg whites
    • Pinch of salt
    • 450 grams (1 pound-4 sticks) unsalted butter, softened and cut into tablespoon-sized pieces
    • 1 teaspoon pure vanilla extract
    • caramel flavour/colour (optional)

    Method

    1. Make caramel: Pour 1/4 cup water into a medium heavy-bottom saucepan. Add 1/2 cup plus 2 tablespoons sugar. Cook over medium-high heat, stirring occasionally, until sugar is dissolved and syrup is clear. Continue to cook, without stirring, until syrup comes to a boil, washing down sides of pan with a wet pastry brush two or three times to prevent crystals from forming. Let syrup boil, gently swirling pan occasionally, until syrup is dark amber.

    2. Immediately remove from heat; carefully pour in cream (caramel will bubble vigorously). Stir caramel until smooth. Transfer to a bowl; let cool.

    3. Whisk together remaining 1/2 cup plus 2 tablespoons sugar, the egg whites, and salt in the heatproof bowl of a standing mixer. Set bowl over a pan of simmering water; whisk until sugar is dissolved and mixture registers 140 degrees on an instant-read thermometer.

    4. Return bowl to mixer; fit mixer with whisk attachment. Beat on medium-high speed until stiff. Reduce speed to medium low; add butter, a few tablespoons at a time. Continue whisking until smooth.

    5. Switch to paddle attachment. Add caramel, vanilla and caramel colour/flavour if using; beat on lowest speed until combined, 3 to 5 minutes. Frost cooled cakes; I used a large closed star tip.

      *visit the official Martha Stewart site for another fabulous caramel frosting Martha Stewart's Brown Sugar Buttercream and it is easier to make.

    Remembering you Mum this weekend. 

    xx

    Chocolate more your thing? You might be interested in Bubble Wrap Chocolate

      or perhaps Chocolate Peppermint Twist Brownie Cupcakes

    Monday
    Aug292011

    Tomato Soup Chocolate Truffles and Cupcake Topping

      tomato soup cupcake topped with chocolate tomato soup ganache

    Back blogging today :) please do join me on Facebook too :) 

    Tomato Soup or "Mystery Cake";  This odd cake of American origins dates back to at least the 1930's and uses canned tomato soup (usually the iconic Campbell's) as an ingredient. 

    Nigella has a version and renowned baker Rose Levy Beranbaum says the tomato soup adds "zing" to the recipe. 

    Goodness me... I'm definitely getting "onion/garlic" but I'm not sure about "zing". I'm wondering if Campbell's Tomato Soup is a different formula in Australia??? Grab a can out of your pantry if you're not from Oz and let me know what is in your tomato soup.... 

                   ingredient list Campbell's Tomato in Australia

    I made Rose Levy Bernbaum's Chocolate Tomato Cake with Mystery Ganache. Now, I do love "Rose" and 'Rose's Heavenly Cakes' is one of favourite cake books, but I don't like this cake at all. My step son Dan and I found at first bite you taste chocolate, but  shortly after an unpleasant aftertaste sets in.

    Slightly more successful was the "Mystery ganache" which I used to make truffles, mmmm not sure if I really like them but it does have that fun "what is it" factor. Oh, the truffles would be great for any Warhol themed event too :)

    The following is a tweaked version (*almost exactly the same!!) of Rose Levy Bernbaum's Mystery Ganache recipe;

    Ingredients 

    1/4 cup of Campbell's tomato soup 

    1 1/2 cups cream

    370 grams (13 oz) dark eating chocolate  

    Method

    Chop chocolate into small pieces with a serrated knife, alternatively use a food processor taking care not to over process. Transfer chopped chocolate into a heat proof bowl. 

    In a saucepan heat cream and tomato soup, stirring once or twice until the mixture just comes to the simmer and small bubbles appear around the edges. 

    Pour hot cream mixture over chopped chocolate and let sit for 2-3 minutes, stir until mixture is smooth. At this stage you can use the chocolate as a glaze cake topping like I have in the cake pictured at top. To do this you can either pour over the liquid ganache or dip the top of cake into it. 

    To make simple tomato soup chocolate truffles, refrigerate the chocolate soup mixture until firm enough to roll into balls, then toss the balls in cocoa to coat. Refrigerate until serving time, bring to room temperature for full flavour. 

                           chocolate tomato soup truffles

    PS promised Japanese Slipper Cupcake recipe.

    Happy Baking :)

    * want to try Nigella's tomato soup cake? ... recipe on her official blog here

    Wednesday
    Aug032011

    Japanese Slipper Cupcake


                                                   Japanese Slipper Cupcake

    I've started recipe development and baking for my return to blogging. Sneak peak of what is going on... it's Japanese Slipper cupcakes today, orange cointreau cupcake, silky MIDORI butter cream & sugar isomalt toppers. 

    The cakes themselves are hand mixed, however the swiss meringue buttercream frosting is best made with a stand mixer such as a KitchenAid. 

    Orange Cointreau Cupcakes

    Preheat oven to 180c (350F) line cupcake tin/s with paper liners

    Makes 12 standard sized cupcakes with a moist pound cake like texture. These cakes are fairly light on with alcohol content, however do remember approxmately 45% of the alcohol content will remain after baking in the cakes and all the content in the frosting.

    Ingredients

    1 1/4 cups plain flour (all purpose)

    1 tsp baking powder

    1/4 tsp salt

    1 cup sugar 

    1/2 cup unsalted butter melted & cooled

    1 egg

    1/2 cup plain yoghurt

    1 tsp grated lemon zest

    2 tsp orange zest

    2 tbs cointreau 

    1 tbls orange juice

    Method

    Whisk together flour, baking powder and salt in a small bowl.

    In a large bowl whisk together sugar, butter and egg until smooth. Swap to a wooden spoon and add yoghurt, zest's, liqueur and juice, beat until smooth. Add flour mix and beat until just smooth.

    Spoon into your prepared cupcake pan/s.  22 to 25 standard sized until the centres are just set and spring up when lightly touched. Cool in tin for 5 minutes before transferring to cooling rack until completely cold. 

    Midori Swiss Meringue Buttercream Frosting

    adapted from Martha Stewart's recipe for vanilla buttercream

    Ingredients

    Makes about 4 1/2 cups, enough for about 14 cupcakes

    1 1/4 cups sugar

    5 large egg whites

    2 cups (450g or 1lb) unsalted butter

    1 tablespoon Midori melon liqueur 

    *125g (4.5 oz) of melted white chocolate, cooled slightly 

    electric green food colour or a combination of green/yellow food colour

    Method
    Place sugar and egg whites in the heat-proof bowl of an electric mixer. Set bowl over a pan of gently simmering water, and whisk until sugar has dissolved and egg whites are hot to the touch, about 3 minutes. Test by rubbing the mixture between your fingers; it should feel completely smooth.
Transfer bowl to mixer stand. Using the whisk attachment, beat on high speed until mixture has cooled completely and formed stiff and glossy peaks, about 10 minutes.
 Add the butter, one piece at a time, and beat until incorporated after each addition. Don't worry if the buttercream appears curdled after all the butter has been added; it will become smooth again with continued beating. Add midori, and beat just until combined. Add food colouring drop by drop until desired colour of green is reached. 
Switch to the paddle attachment, and beat on the lowest speed to eliminate any air pockets, about 4 minutes. Add melted white chocolate beat for one minute or until combined.

    If using buttercream within several hours, cover bowl with plastic wrap, and set aside at room temperature in a cool environment. Or transfer to an airtight container, and store in the refrigerator, up to 3 days. *Before using, bring buttercream to room temperature, and beat on the lowest speed with the paddle attachment until smooth, about 5 minutes. Pipe with a round or star tip onto cooled cakes. 

    * make sure melted chocolate and beaten frosting mix are approximately the same temperature, if the frosting is too cold when the chocolate is added it will partially set and not incoroporate fully.

    * when you start to beat your buttercream from it's refrigerated state, the buttercream will look curdled; don't be worried it will start to incorporate as it beats further. 

    I will be adding the isomalt topper instructions this week... 

    Until then happy baking :)

    PS I'm now on facebook  join me to keep up with blog updates, little extras & give a ways. 

    Saturday
    Jan292011

    Eric the Valentine Emu Cupcake

                                 Eric the Valentine Emu cupcake

    Emu; second largest bird in the world by height, native to Australia. Covered with soft brown feathers, the emu male can reach up to a height of six foot six (201 cm) and has knife like nails. Emu's are curious and nosy animals.

    Valentines Day in Australia is different than in the US, we don't buy make or buy Valentines for all our friends and family. Valentines Day here it's all about your boyfriend/girlfriend, husband/wife, lover or significant other; it's a time when men book "that" romantic restaurant, shop for lingerie, chocolates and red roses.

    But I digress, it wouldn't be an "Australian animal" if I hadn't had at least one run in with one, so here goes...

    The picnic grounds were crowded, the giant bird waited until the chubby little blonde girl was about to take the first bite of her Vegemite sandwich before confronting her.

    The emu can't fly but the little girl had the "fight or flight instinct" and she ran. Her Mum was first one to yell "drop the sandwich", followed by a chorus of voices "drop the sandwich!", "drop the sandwich!" Try as she might the little girl couldn't drop the Vegemite sandwich that was now squashed between her clenched fist, she was too busy running. But eventually her legs tired and she stopped, dropped her sandwich that was quickly gulped down by the emu. 

    What followed was reminiscent of a 'Law and Order' episode, you know the bit where they throw in a funny one liner over the corpse of the just murdered body; the chubby little girls parents, Ranger Tom and the Emu stood there laughing (well, the emu wasn't laughing but he might as well have been). Ranger Tom quipped "You're a lucky little girl the emu loves you, they can rip out your guts with those claws"... everyone laughed... it wasn't funny!!! 

    Before you dismiss "emu love", take into account that after the female emu lays her eggs the male takes over hatching and raising the children; leaving the female free to find another male. Something to consider perhaps on Valentines Day when you open the fancy box your husband has given you to discover that "red satin sequinned thong"; just want you always wanted (NOT) when all you actually desired was someone to wash the dishes and mind the kids so you could go to yoga class. 

    Eric being made with various batches of coloured fondant/modelling paste

    Roll the fondant/modelling paste paper thin, I mixed the colours together. 

    Use a small sharp knife to cut feather shapes, attach to your bird with cake glue or water. 

    Happy Baking :)

    You might also like to make a batch of raspberry curd this Valentines Day....

                        Raspberry Curd

    To make simple raspberry curd heart cupcakes use a small heart cutter to cut a heart shape from the centre of your baked cupcake. Remove the heart, fill centre with raspberry curd & clotted or pure cream. Top with your heart cut out & dust with icing sugar.

    Tuesday
    Nov302010

    Thor Cupcake

    fondant and modelling paste bust of Thor cupcake

    Thor's Hammer ;

    The Prose Edda gives a summary of Mjöllnir's special qualities in that, with Mjöllnir, Thor:

    ... would be able to strike as firmly as he wanted, whatever his aim, and the hammer would never fail, and if he threw it at something, it would never miss and never fly so far from his hand that it would not find its way back, and when he wanted, it would be so small that it could be carried inside his tunic.

    wikipedia

    Short post today with this special cupcake for my stepson Dan. I'm so behind the times, Daniel kept talking about that his "dream cake" would be Viking metal and Star Wars combined. I thought that meant the "Vikings" would be metallic, but no... "Viking metal" is music apparently! 

    Guess this means I'll have to learn the whole Star Wars saga whilst listening to Viking metal before I make Dan a cake ;)

    rough torso and adding nonpareils to hammer

    part way through working on the head of the Viking supported by a box of currants

    almost finished painting

    fondant and modelling paste coloured grey with americolor super black, painted with sliver food paint and finished with silver lustre dust.

    Today's cupcake was my first attempt at a "human" head, l learnt a lot and I'm looking forward to sharing it with you in a future post, but for now I'm back to Christmas baking.

    Happy Baking :)

    Page 1 ... 2 3 4 5 6 ... 8 Next 10 Entries »