Navigation
SEARCH
This form does not yet contain any fields.

    Entries in raspberry (9)

    Monday
    Jun152015

    The Red Velvet Rose (cake) Rose's Alpha Bakers

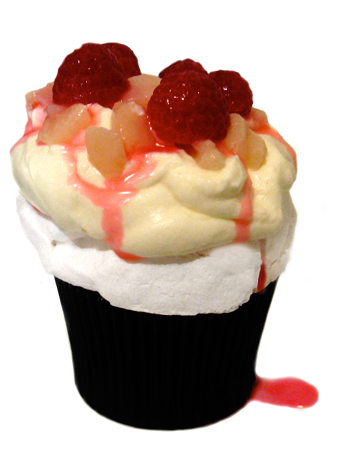
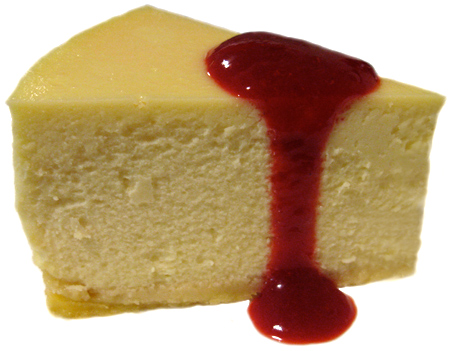
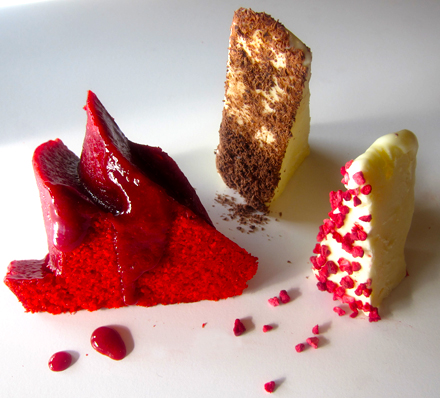
    red velvet rose cake with raspberry sauce, served with ice-cream

    Join me on Facebook

    What's in a name? that which we call a rose
    By any other name would smell as sweet;

    Romeo and Juliet  William Shakespeare 

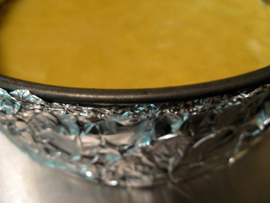
    I didn't have the rose bundt pan needed for today's Red Velvet Rose cake from 'The Baking Bible' bake, but I baked in anyway in the heritage bundt pan. 

    There is a few different options for this cake colour/flavour wise, at Christmas I used beetroot juice to colour and the extra cocoa option.  Colour wise the resulting cake was a non descript "brownish hue". Today I went with less cocoa and red food colour.

    Ok, I can see the appeal of red velvet for valentines, weddings or even Halloween but really "I don't get it"...it's not on my list of favorite cake varieties. 

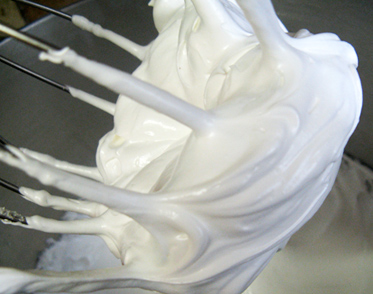
    Today's bake started with mixing egg whites, red food colouring and vanilla to combined.

    yep nice and red

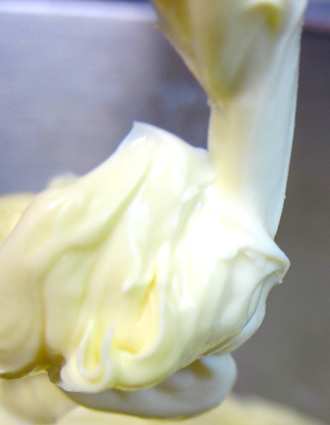
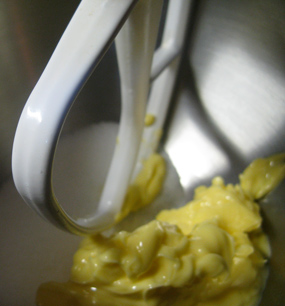
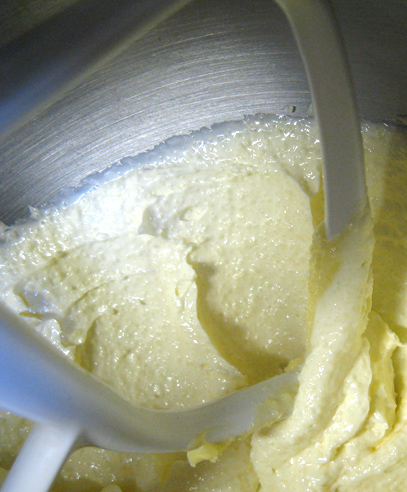
    Butter, oil and sugar were beaten to fluffy. I liked this in the recipe, the taste of butter combined with moistness oil adds to cakes. A flour mixture including a small amount of cocoa was mixed in, then the red whites were added.

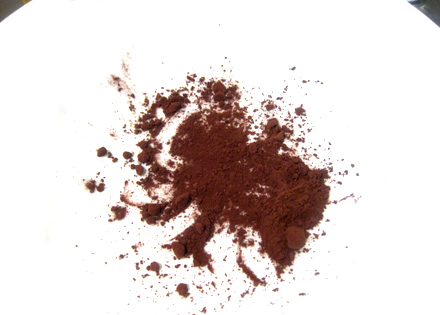
    tiny amount of cocoa powder

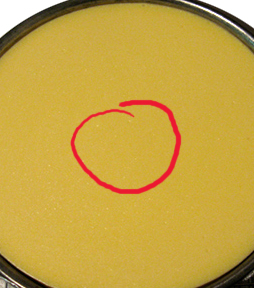
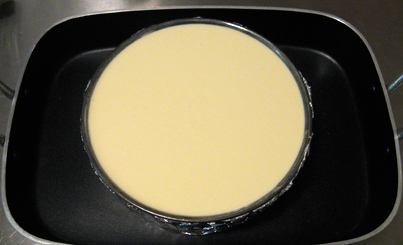
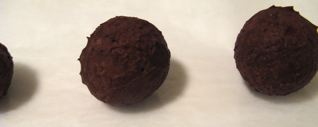
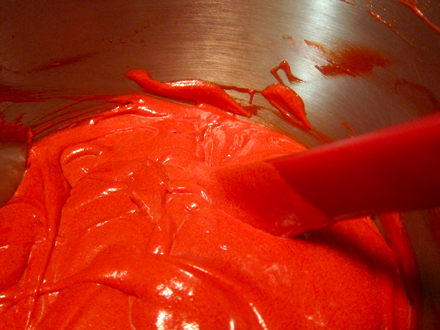
    resulting red batter once all the ingredients were combined

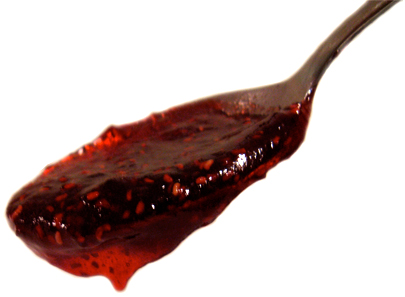
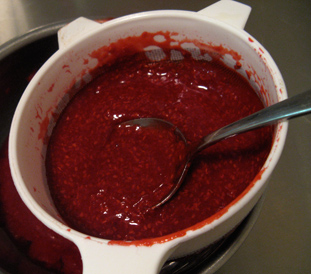
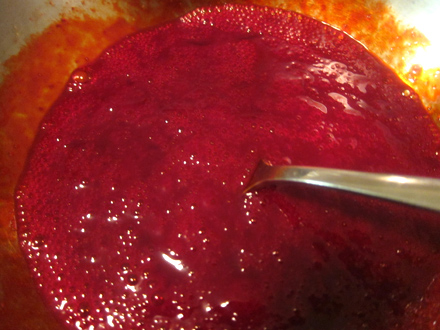
    Whilst the cake was baking I was defrosting frozen raspberries to gather to juice to make a reduction.

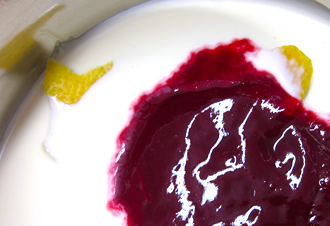
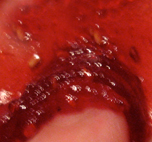
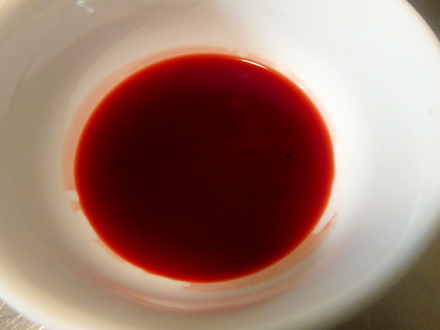
    The reduced juice was added to raspberry pulp, sweetened and sieved to make a brushing sauce.

    This sauce has a threefold action of moistening, adding a lot of fresh flavour plus adding more colour. The sauce seeps into the cake after a short rest period. 

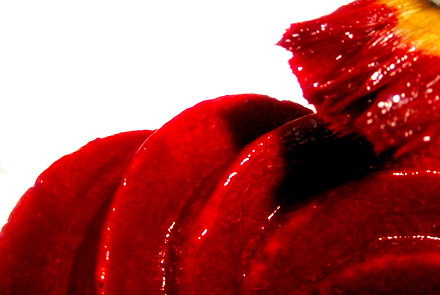
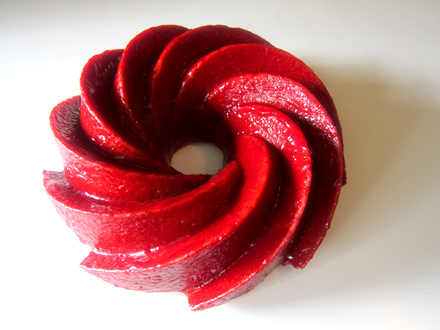
    Cake after it has been entirely brushed with sauce. 

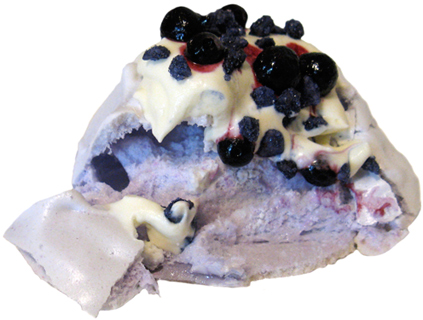
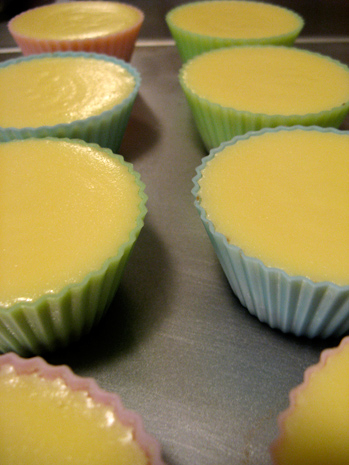
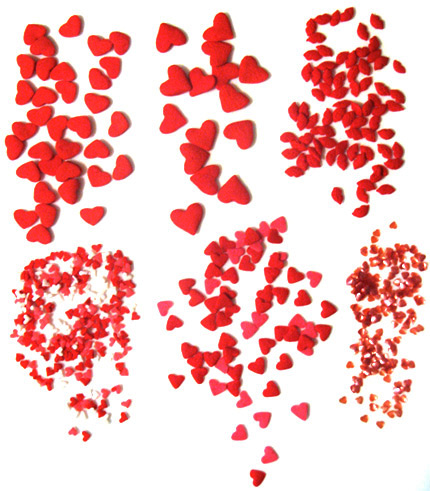
    I served the cake with ice-cream wedges spinkled with freeze dried raspberries and grated chocolate. I made an extra thick raspberry sauce using the leftover sauce as a base. 

    The cake has a great light texture, I loved the raspberry sauce. The red colour I found a little "frightening.

    Yes, there has been a lack of other blog posts... oh my goodness if there is a winter bug in the air apparently I'm going to catch it!! Thanks Jacinta for the homemade soup, medicine, gift and the rest :) I'm sure that will make me feel better.      

    Happy Baking :)                                                                                                                                                                                                                      

    Would I make again? No, unless family/friend requested which is possible, it's not my kind of cake but I have a family member who loves it. 

    Would I change anything? Hmmm, don't know really red velvet by it's very nature of intense colour is difficult to flavour.

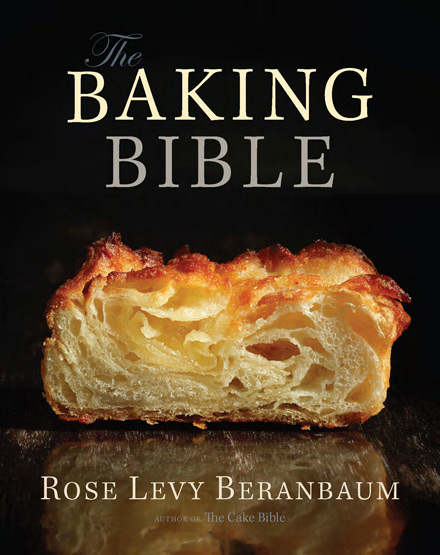
    How it works... now I've joined the fabulous existing alpha bakers, once a week I will post about what I have baked from Rose Levy Beranbaum's 'The Baking Bible'. This won't include the recipe due to copyright and publisher restrictions however, I will be posting how it went and photos of making/baking the gorgeous baked goods.

    The Baking Bible  available from Amazon and all good book stores. 


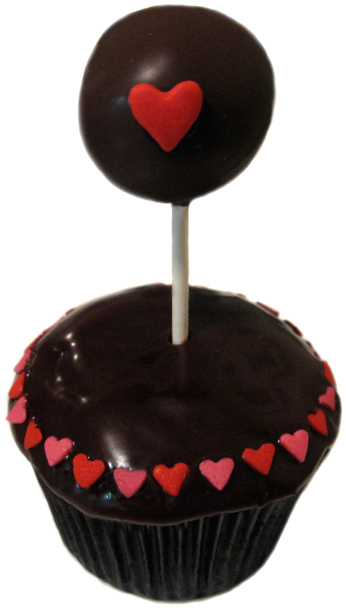
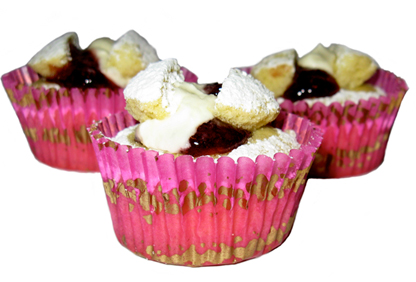
    You might also be interested in a cocktail, cupcake style with a Japanese Slipper Cupcake 
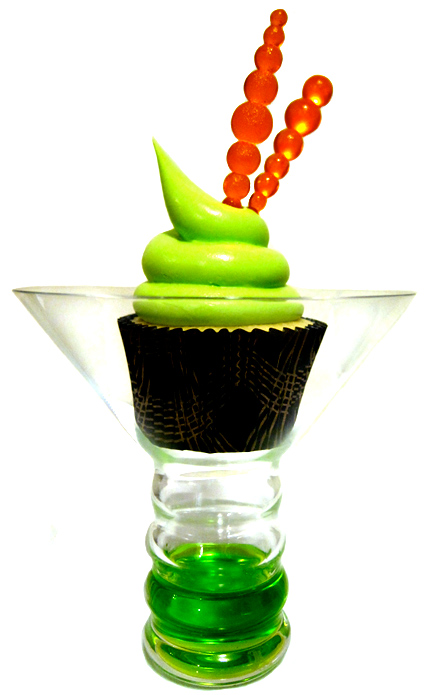
    Tuesday
    Nov272012

    Raspberry Custard Melting Moments recipe

                                        raspberry custard melting moments 

    Join me on Facebook

    Melting moments biscuits (cookies) are popular in Australian cafes and loved by home bakers.

    Yum, melting moments today; the soft textured shortbreads sandwiched with a sweet filling are perfect to serve with a cup of tea or favourite brewed beverage (I mean coffee, not beer... but hey I'm not one to judge). 

    popular brands of custard powder

    Now I've used 'custard powder' as part of the flour component of the recipe, it gives the biscuits a golden glow and a slight custard flavour. Custard powder is a commercial product that Aussies and Brits have been raised with, you can replace with an equal amount of cornflour if desired.

    Mine have a white chocolate raspberry ganache filling, but they can also be filled with butter cream or even a simple icing. 

    Raspberry Custard Melting Moments

    adapted from Donna Hay's 'modern classics book 2'

    Preheat oven to 160C (320F)

    line two baking trays with non stick paper

    makes 36 biscuits (18 sandwiched)

    ingredients

    175g unsalted butter, cubed and softened 

    1/4 cup pure icing sugar (confectioners sugar)

    1 tsp pure vanilla extract/essence 

    1 cup plain flour, (all purpose) sifted

    1/4 cup custard powder sifted 

    pinch of salt

    filling

    90 ml (3 fluid oz) pouring cream

    2 tablespoons of raspberry puree (squashed fresh or frozen raspberries pushed through a sieve)

    2 tablespoons of homemade or best quality raspberry jam

    1 piece of lemon zest (use a potato peeler)

    180 grams (6.34 oz) white eating chocolate finely chopped 

    method

    Place the cubed softened butter, icing sugar and vanilla in the bowl of electric mixer and beat on medium high speed until light and fluffy. 

    what light and fluffy looks like

    With a spatula or metal spoon stir through the sifted flour, custard powder and salt. You're just stirring until the ingredients are just combined, excess stirring with cause the gluten to develop and toughen the resulting cookies.

    Ok, if your mixture is too soft to roll into balls pop the whole bowl in the fridge for 20-30 minutes to firm up enough to roll teaspoons of the mixture into balls.

    Divide the balls between lined trays. Use a fork to press gently on top of each ball to make a indented pattern.

    Bake biscuits 15 to 17 minutes until lightly golden. 

    Set aside to cool.

    Make the filling by heating the cream, raspberry puree, raspberry jam and lemon zest stirring gently to incorporate until the cream "just" comes to the boil. Remove from heat, remove the lemon zest and pour hot mixture over the white chocolate, stir until smooth. Allow to cool until thick enough to spread.

    pipe the filling like I have with raspberry or plop on a little like I have with the *vanilla nutmeg

    Spread or pipe filling onto 18 cookie halves and sandwich with another cookie.

    Melted moments benefit from being stored overnight before eating... if you can wait!!

    Oh, I made up gift tins using small blank tins and printed labels on A4 paper. Clip art reindeer from Microsoft clip art.

    Goodness, this story is getting longer and longer I'll go before we hear the New Year countdown.

    Happy Baking :)

    *vanilla nutmeg filling; follow instructions for raspberry filling omitting the jam, raspberry puree and lemon. Once melted add one teaspoon of pure vanilla extract. Allow to cool until thick enough to spread. Grate fresh nutmeg on filling before sandwiching cookie.


    You might also be interested in making you own raspberry jam

    Got leftover custard powder, why not give 'Mum's vanilla slices' a try?

    Thursday
    Apr262012

    Raspberry and Orange Gluten Free Friands

    Join me on Facebook

    Goodness me, is $5.50 each too much to pay for a small gluten free friand? That's what our local department store cafe was charging when I was there with friends recently. 

    The poor little plain orange friands looked a bit on the dry side; it got me thinking about why are gluten free cafe cakes always so dry, hard and often lacking in flavour? 

    With only 1/3 to 1/2 cup of flour per recipe friands must be one of the easiest recipes to convert to gluten free. I tested the following gluten free friand conversion out on friends and family this week, concentrating on "moistness" and packing with flavour. Everyone loved them... hope you do too :)

    Raspberry and Orange Gluten Free Friands

    greased oval friand tin or muffin tin (1/2 cup 125ml capacity)

    preheat oven to 200c (392F) or 180c (356F) fan forced

    Ingredients

    6 egg whites

    185g butter melted and cooled

    1 tbl orange juice

    1 cup almond meal (almond flour) 

    1 1/2 cups (240g) sifted pure icing sugar (confectioners, make sure it's pure with no flour added)

    1/2 cup gluten free plain flour (gluten free all purpose) 

    4 teaspoons fine orange zest

    1 cup of raspberries, fresh or frozen

    Topping

    1/2 cup toasted slivered almonds

    optional .... 1/4 cup freeze dried raspberry pieces

    1 cup of sifted pure icing sugar 

    1 to 2 tablespoons of orange juice

    Method

    Put the egg whites in a medium bowl in a medium bowl, use a fork to lightly whisk and break up the whites. Add the butter, zest, almond meal, sifted icing sugar, juice and *berries; stir until the mixture is combined. 

    Divide the mix between the 12 hole pan. Bake 18-22 minutes, don't over bake. Allow to cool 5 minutes in pan before removing cakes and transferring to a cooling rack. 

    adapted from AWW lemon and cranberry friands

    Icing

    In a small bowl, add one tablespoon of orange juice to sifted icing sugar. Stir until smooth, add more juice if needed to created a drizzle over consistency. 

    Drizzle over icing and top with toasted almond slivers and freeze dried raspberry pieces.

                             moist and flavourful 

    Notes:

    *if using frozen berries don't defrost first, stir through in their frozen state

    *if you can source freeze dried raspberry pieces they do add a natural flavour punch; the pieces will loose their crispness after a short while however they still will taste wonderful.

    *undecorated friands freeze well wrapped for three weeks, defrost in the refrigerator before decorating.

    *friand tins are easily available in Australia, mine is a Wiltshire tin from the supermarket. Cute Mini friands  silicone moulds are available on Amazon..they really are "mini" about 3 teaspoons of batter per hole.

     Happy Baking :)

    Need to use your left over egg yolks? How about a batch of pastry cream to fill tarts, pastries and cakes.

    Or an easy Hollandaise sauce.

    Friday
    Nov252011

    A Zumbo Macaron

    clockwise front: raspberry caramel, lime and mint mojito, cola, lemon verbena, caramelised pumpkin seeds and milk chocolate, chilli and cinnamon.

    On a recent trip to Sydney my step son Daniel and his beautiful girlfriend Trish went macaron shopping at pastry chef extraordinaire Adriano Zumbo's Balmain store. Daniel returned to Melbourne laden with pastries and boxes of macarons. 

    Daniel and Trish

    Goodness all the macarons were incredibly good and the perfect example of what a macaron should be. With super thin crisp shells yielding to soft and chewy interiors and "oh, the fillings" well, lets have a look at the flavours.... 

    Raspberry Caramel; this reminded me of something from childhood, perhaps the caramelised jam at the bottom of jam pudding?  I, who doesn't like caramel usually loved this one. There is the traditional "burnt sugar" taste to these and the punch of raspberry from the not overly sweet jam like filling.

    Lime and Mint Mojito; Daniel and Trish's favourite flavour... and my husband was quiet taken with these too. The strongest colour and flavour of all macaron's we tasted, a clear burst of lime followed by a fresh mint flavour. Bit "sparkly" and pretty these ones :)

    Cola; Yes, it tasted like "cola". Nice colours, we all liked it with Daniel commenting he would have liked the cola flavour to be more pronounced. 

    Lemon Verbena; Who would have thought?? After 18 years of marriage my husband and I finally agreed on something!! We both voted the unassuming, pale leafy green macaron our "favourite". Beautifully balanced flavour and it is was refreshing and creamy at the same time.

    Caramelised Pumpkin Seeds; Voted "ok" by all of us. They weren't awful, but they weren't a "stand out" like some of the other flavours. 

    Milk Chocolate Chilli and Cinnamon; These were "yum", just the right amount of heat in these babies, contrasting with the creaminess of the milk chocolate filling. If I was only to buy one flavour to serve at a party/dinner these would it. Fun and delicious.  

    We also tried a few individual tarts, including 'Grandma's soap' a lavender concoction comprising of blueberry compote, fresh blueberries, lavender chantilly & almond cème. The classic passionfruit curd and and pâte sucrée and the fab 'Whizz Fizz'...

    Inside the Whizz Fizz tart with it's raspberry meringue, sherbet, raspberry compote, liquorice crème. This was "Wow!!". The pastry in all the tarts is so good and unlike any pâte sucrée I've tasted before, my goal for 2012 is to emulate, that taste, texture and flavour.

    Well, it's a big week for Adriano Zumbo with his new store opening at Star Casino. If your in Sydney you must go check it out. 

    Oh, don't forget it's Zumbo's MACARON day this Sunday... go with an empty belly and fill up on the plethora of fabulous flavours. Get all your updates for the day straight from Zumbo's website, browse the patisserie menu whilst there.  Zumbo 

    Happy Baking :) 

    I'll looking at the Zumbo cookbook in up coming weeks but for now you might be interested in; Daniel's review of Lindt's Chocolate Cafe  

    or a review of the Laurent Patisserie 

    Friday
    Apr232010

    Pavlova Cupcakes

    lychee, raspberry & rose syrup pavlova cupcake

    Not much in the way of dessert making on MasterChef as yet, but there was a pavlova courtesy of guest judge Donna Hay. Sooo, to mark the return of MasterChef I thought I'd make mini pavlova's for cupcake toppers.

    Ingredients

    12 baked cupcakes in flavour of choice (I used vanilla buttermilk cupcakes)

    3 egg whites (room temperature)

    165g (3/4 cup) caster sugar (superfine)

    2 tsps cornflour (cornstarch)

    1/2 tsp white vinegar

    1 tsp pure vanilla essence/extract

    Decoration Ingredients

    300ml (0.63 pint) of cream, whipped. Flavour the cream with liqueur if desired

    Topping can be anything you like, I used lychees, raspberries & a drizzle of rose syrup.

    Other topping suggestions are; passionfruit & flaked white chocolate, strawberries & kiwi fruit, dark chocolate curls and hazelnuts, crushed peppermint candy, milk chocolate & peppermint liqueur cream, mango/paw paw/banana and coconut, strawberries, blackberries, raspberries & red currants, peaches with raspberry puree drizzle, chocolate dipped strawberries, orange and chocolate, fresh or preserved stone fruits.

    Method

    Preheat oven to 120c/250F (100c/210 fan forced)

    Line a cookie sheet with baking paper, trace 12 6.5cm (2.5in) circles onto the paper & reverse the paper on the tray so the ink won't touch the food.

    In an electric mixer fitted with a whisk attachment, beat egg whites until soft peaks form. Gradually add sugar, one tablespoon at a time, beating until sugar is fully dissolved between additions... this will take a few minutes.

    It should be looking like this now...glossy and shiny meringue

    Fold in the cornflour, vinegar & vanilla.

    Divide the meringue between the circles drawn on your baking paper.

    Bake for 45 minutes or until cases are firm.

    Cool totally in oven with the door slightly ajar; use the handle of wooden spoon to keep the door ajar.

    Pavlova's will have a white thin crispy shell and soft marshmallow interior

    Just before serving spread a little cream or frosting on the centre of the cupcakes to attach the pavlova. Place pavlovas on the cakes and topping with cream and desired topping.

    You might also be interested in;

                                Violets are blue pavlova  

    Saturday
    Feb202010

    New York-Style Baked Cheesecake

    New York-Style Baked Cheesecake

    It might seem slightly daunting seeing the length of this recipe today but this baked cheesecake is so fabulous it's worth foregoing the mix and chill type cheesecakes just once and trying this baked New York-Style Cheesecake.

    Step-son Dan adores this cheesecake & it's become a must have for not only his birthday yesterday but for all special occasions. 

    The following recipe was first published in Martha Stewart Living Magazine in May 2004. I've kept it pretty much the same, only reducing the oven temperature & increasing the vanilla. 

    The cheesecake tin used in the magazine is larger than the Australian standard, I used a 22cm (8.5in) springform cheesecake tin which leaves enough filling to make 12 cupcakes in silicone moulds. If you do have the 10 inch springform tin used in the magazine you can bake one large cheesecake, increase baking time by 15-20 minutes. 

    Due to conversion Aussie's will have leftover cream cheese & sour cream.

    Wobble

    There is many cheesecake making & baking tips like making sure your ingredients are at room temperature, not over beating once the egg is added, baking in a water bath, but I think the one to remember is the "wobble". Regardless what size pan you are using what you are looking for is the sides to be set & centre still wobbly, turn off the oven at this point for the perfect cheesecake!

    The all important "wobbly center" zone

    Starting with the pastry base from the magazine, but by all means substitute with your favourite biscuit/cracker crust if desired.

    Vanilla pastry base

    Ingredients

    113g (1 stick US) unsalted butter softened

    1/4 cup sugar

    1 large egg yolk

    1 teaspoon pure vanilla

    3/4 cup plain flour (all-purpose)

    pinch of salt

    Method

    Using a stand mixer with the paddle attachment, cream butter & sugar on medium speed until light and fluffy; about 3-4 minutes.

    butter & sugar before beating

    after beating; what "light & fluffy" looks like

    Mix in egg yolk & vanilla then add flour and salt & mix until just combined. 

    Shape dough into a disc, wrap in plastic wrap and chill at least 30 minutes.

    dough ready to chill

    Roll out dough 3/4 of the dough between non-stick baking mats or baking paper until you have an 8cm circle. Lift the mat/paper and flip dough onto the base of your cheesecake tin. Attach the sides of the cheesecake tin & wrap the exterior (including base) with a double layer of foil. 

    springform cheesecake tin wrapped in double layer of foil

    Preheat oven to 180cel (350F) Freeze dough in the pan for 15 minutes. Place tin on a bake tray and bake for about 15 minutes until golden brown, set aside to cool.

    Divide the remaining 1/4 of the dough between *12 silicone cupcake cases, using your fingers to press down dough on the base of the cups.

    Bake base for 7 to 8 minutes or until set. Set tin on a rack to cool.

    Place cupcake cases on top of a baking tray and bake for 7-9 minutes or until golden brown. Leave oven on.

    New York-Style Cheesecake

    Ingredients

    1/2 cup plain flour (all-purpose)

    7 packets of Philadelphia Cream Cheese (225g each in Australia, you will have 175g cream cheese leftover) (US 8oz packs)

    2 1/4 cups sugar

    1 cup of sour cream (250ml), room temperature

    2 teaspoons of pure vanilla extract

    5 large eggs, room temperature

    butter to grease pan, boiling water & roasting pan

    Method

    Put the cream cheese in a bowl of an electric stand mixer fitted with a paddle attachment, mix for 3-4 minutes until fluffy. Sift together flour and sugar, with the mixer on low speed add flour/sugar mix in a slow steady stream; mixing until smooth. Add the sour cream and vanilla; mixing until smooth.

    Add eggs one at time, mixing until just combined (do not overmix).

    Grease the sides of the tin with butter, pour cheese mix into the tin filling to almost the top.

    Divide remaining cheese mix between the 12 cupcake cases.

    Bake your cupcakes first; reduce oven temperature to 135cel (275F) & bake for about 20 minutes until the sides are set and the centres are still wobbly. Cool on rack. Once cool refrigerate uncovered for 4 hours. Mini cupcake cheesecakes keep for up to 3 days in a sealed container in the refrigerator or can be frozen, well wrapped for up to one month.

    cupcake cheesecake in silicone moulds

    Increase oven temperature to 160cel (325F)

    Place large cheese cake into roasting pan place on oven rack, carefully pour boiling water around tin until halfway up the sides of cheesecake tin. 

    cheesecake in roasting pan ready for the oven & water bath

    Bake one hour & 30-45 minutes, or until sides are set but centre is still wobbly. Turn oven off, put a wooden spoon in the oven door to allow the cheesecake to slowly cool for one hour in the oven.

    cooly slowly helps prevent your cheesecake cracking

    Transfer cheesecake tin to rack and let cool completely. Refrigerate uncovered for a minimum of 6 hours, but preferably overnight. 

    Raspberry Sauce

    Ingredients 

    2 cups of fresh or frozen raspberries

     juice of half a lime or lemon

    1/4 cup sugar

    Method

    Using a blender or a food processor, process until smooth and push through a strainer to remove seeds.

    Taste at this point, if you feel it needs more sugar stir in a little extra until it is dissolved. Keeps in a sealed container in the refrigerator up to 3 days.

    Serve chilled sauce on cheesecake slices.

    *Variations; the cheesecake can easily become lemon, lime or your citrus of choice by adding 2 teaspoons of finely grated zest when beating the cream cheese & reducing  vanilla to a 1/2 teaspoon.

    Leftover raspberry sauce can be drizzled over vanilla bean ice-cream or served with chocolate cake.

    Friday
    Feb052010

    Valentines Truffle Pops

    Valentines Truffle Pop tops a chocolate & raspberry crème fraiche cupcake

    The beauty of this truffle recipe is it's versatility, if you don't like raspberry liqueur, feel free to change it to coffee or orange or perhaps rum. Use vanilla, coffee, green tea, ginger or flavouring oils instead of alcohol. If you are using truffles as cupcake toppers adjust the flavours of your cupcakes accordingly.

    Try milk or white chocolate instead of dark, a mix of milk and dark chocolate is my favourite.

    Simply toss them in *cocoa, or roll in melted chocolate and then in *crushed toasted nuts, crushed hard candy, sprinkles, coconut, grated chocolate, sanding sugar or dip them in chocolate for a smooth coating.

    These truffles have a whipped light texture and keep well when refrigerated for up to two weeks. Today I'm using them on lollipop sticks to make cupcake toppers. 

    Valentines Truffle Pops

    Ingredients

    Makes 24

    150ml cream (5 fluid oz)

    125g dark eating chocolate (4.4oz) grated (use a food processor if desired)

    125g milk eating chocolate (4.4oz) grated

    3 tsp Raspberry liqueur (optional)

    24 lollipop sticks

    24 heart shapes, either make yourself from fondant or buy pre-made. 

    24 iced, frosted or glazed cupcakes

    plus of 375g (13oz) tempered dark chocolate if planning to chocolate coat the truffles

    Method

    Place the both the grated milk & dark chocolate into the bowl of your stand mixer. In a medium saucepan bring the cream to the boil. Remove from heat, let cool for a minute or two and then tip in grated chocolate.

    Beat on medium high speed for 5 minutes, stop the mixer and the let the chocolate mixture become cool. Add the raspberry liqueur if using and beat a further 5 minutes. The mixture will become lighter in colour and texture. 

    Refrigerate the mix for 15 minutes or until chocolate is firm enough to handle. 

    Line a baking sheet with baking paper & with clean hands roll 2 tsp's of mixture into a ball, place on baking tray and repeat.

                   Rolled truffles before coating

    Chill for 5 minutes.

    Have your cupcakes ready.

    Remove truffle mixture from the refrigerator, insert the lollipop sticks, then dip each truffle one by one into the tempered dark chocolate, place each completed truffle pop into position on the cupcakes. When the pops are set, attach heart decorations with a dab of melted chocolate.

    *You will need 75g-2.6oz of dutch process cocoa or crushed nuts to coat 25 truffles

    You might also be interested in;

    Love heart Sprinkles

    You might also be interested in;

    Chocolate Ganache & Truffles

    Friday
    Jan222010

    Raspberry Jam

    Join me on Facebook

    I need jam for upcoming recipes this week, raspberry jam to be exact. If you haven't made jam before, raspberry jam is the easiest jam to make, as raspberry seeds are packed with pectin that sets the jam for you without having to add any setting agents.

    It tastes divine, keeps for one year in sterilised jars (though I think it's better when it's fresher), & can be made with fresh or frozen raspberries. 

    Raspberry Jam ( makes 2-3 jars depending on jar size)

    450g (1lb) raspberries (fresh or frozen)

    450g (1lb) sugar

    1 small plate refrigerated (to test for setting point)

    Put the berries and sugar in a large saucepan. Over low heat bring to a simmer, stirring to dissolve the sugar.

    Once the sugar has dissolved, increase heat and bring to the boil, boil 5-9 minutes until *setting point is reached. Pour into hot sterilised jars and seal.

    *recipe can be halved if you only need enough jam for one cake, reduce your pan size but do use a pan big enough to allow for the fruit to rise once boiling.  


    Bit of tricky shot pushing jam with one finger and holding the camera with other hand, but hopefully you can see the "wrinkle" of jam for the testing stage. 

    Testing for setting point

    Although traditionally raspberry jam has a looser set (a little bit runny) for filling cakes and cookies I like a firmer set. Starting testing for setting point from the 5 minute mark, by putting a small spoon of hot jam on your refrigerated plate. Wait 30 seconds and gently push the edge of the jam with your finger, if the jam wrinkles it's ready. 

    Of course you could use a sugar thermometer if you prefer --- 105C (221F)

    Sterilising Jars

    For larger quantities of jam you can use a dishwasher to sterilise jars, but since we only have a couple of jars here we will use the oven.

    Place your 2 clean jam jars on an oven tray in the oven, heat at 180C (350F) for 15-20 minutes. Remove from oven with oven gloves to a heatproof surface when you are ready to fill your jars. 

    Add in's 

    You can a tablespoon of liqueur if you like at the end of cooking the jam, Grand Marnier is nice with raspberries as is Chambord. 

    Spices are a nice addition, cinnamon, star anise, pink peppcorn all pair well with raspberries. Fine orange zest can be added too, or scrape a vanilla pod of it's seeds and add that for raspberry vanilla jam.  

    Too sweet? Prefer your jam tarter? Add the juice of lemon at the start of the cooking process.

    *You can use your jam straight away but with any add ins at least 24 hours to mature the jam allowing the flavours to meld/soften is a good idea.  

    Here it fills Butterfly cakes; bake simple small vanilla cupcakes like the ones I used for tiramisu cupcakes, cut circle from the top of the cooled cake, cut that circle in half to form "wings". Fill the cakes with pure or clotted cream and freshly made raspberry jam, position the "wings", dust with icing sugar. Pretty cakes for afternoon tea or children's parties. 

    Friday
    Nov132009

    Christmas Friands


                         Pistachio & Raspberry Christmas Friands


    Friand
    Small moist oval café cake popular in Australia and New Zealand.

    Not related to the French friand which is puff pastry wrapped around sausage meat, what Australians would call a 'sausage roll'.

    But rather they seem to originated from the French financier tea cake.

    Made mainly of nut-meal, usually almond, though other nuts such as walnut, pistachio & macadamia can be used. Friands often have fruit or chocolate added to them. 

    So popular in Australia that McDonalds sell them.McDonalds *Gluten free Chocolate & Gluten free Raspberry Friands


    Pistachio & Raspberry Christmas Friands

    Ingredients

    1 cup (140g)  *lightly toasted unsalted pistachios (4.95oz)
    I cup of raspberries 
    6 egg whites
    185g butter (6.5oz)
    1 1/2 cups  (240g) sifted icing sugar (confectioners sugar 8.5oz) 
    1/2 cup (75g) plain flour (all purpose 2.6oz)
    I tsp of vanilla

    Preheat oven to 180c (356F) Line 12 hole tin with paper cases. I used a friand tin, but you could use a muffin tin.

    Method

    Process cup of pistachios (less one tablespoon) in a food processor until finely ground. Cut the remaining pistachios into slivers.

    Cook butter in a small saucepan until a golden brown colour (it should smell nutty). Set aside to cool.

    Place egg whites in a medium bowl, whisk lightly until combined. Add cooled butter, icing sugar, flour, pistachios & vanilla, stir until combined. Stir in raspberries.

    Divide mixture between papers in tray. Bake about *20-25 minutes. 

    Stand in tray 5 minutes before turning out on to a cooling rack to cool.  

    Dust with icing sugar to serve. 

    Keep in sealed container up to three days.

    Notes*
    Lightly toast raw pistachios by stirring them in a dry pan over medium-low heat for a minute or two. 

    The cakes should be moist; due to differing oven/tins/case sizes just check a few times towards the end of the baking period as to not overbake.

    The small amount of flour in friands means they are an ideal "convert to gluten free" recipe, replace flour with gluten free flour of choice.