Navigation
SEARCH
This form does not yet contain any fields.

    Entries in cupcakes (51)

    Sunday
    Aug222010

    Bubble Wrap Chocolate Decorations for Cupcakes

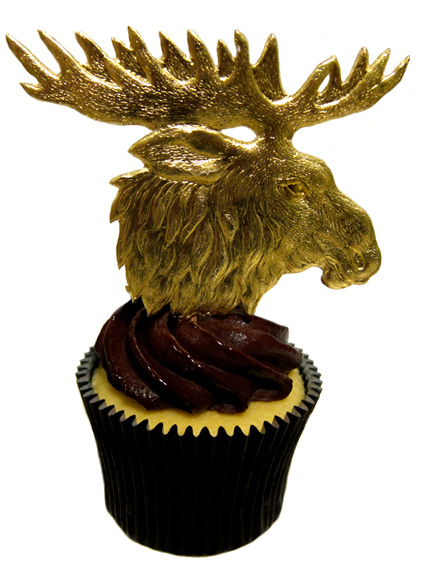
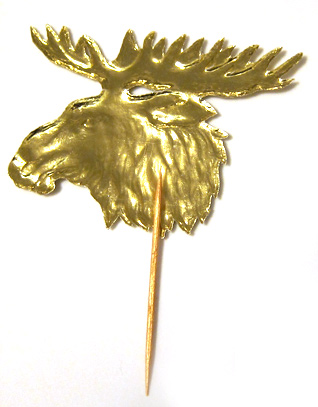
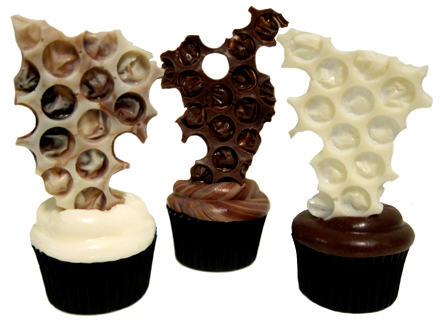
                      assorted bubble wrap chocolate cupcake toppers


    Join me on Facebook or view more cupcakes in my Flickr gallery 

    POP!  POP!  POP! Is this you with a piece of bubble wrap? Stop your "popping" and start making bubble wrap chocolate decorations for your cupcakes. These super easy chocolate toppers are fun to make and I'm sure you have a secret stash of bubble wrap tucked away somewhere right?  

    All you need is a piece of clean bubble wrap and melted tempered chocolate.

    Place your bubble wrap bubble side up on a baking mat or tray.

    Spread your melted chocolate over the bubble wrap.

    Allow the chocolate to set and peel off the bubble wrap & voilà you have bubble wrap chocolate. Your piece of bubble wrap can be used over & over again.

    Want curved pieces? Then lay the bubble wrap with the wet chocolate side upwards over a rolling pin or small bowl, allow chocolate to set and peel away bubble wrap.

    Want coloured chocolate? The see "colouring chocolate"

    You can also cut your chocolate into shapes or shards; peel away bubble wrap from the chocolate when it is at the "just set" stage and before the chocolate is fully hardened. Use a sharp or serrated knife to cut the chocolate bubble pieces into shape. Or just break pieces off for abstract shapes.

    Make holes in your bubble chocolate by using a heated skewer or tip of a small knife to melt out the middle part of the chocolate bubbles. If you create very thin bubble sheets of chocolate you can pop out the centres with a piping tip etc without having to use heat.

    Bubble wrap chocolate has a variety of applications, all the way from making "coral" for sea scenes or bee hives to the most elegant cupcake decorations. 

    So why are you still reading this? Go on, hunt for that piece of bubble wrap and give chocolate bubble wrap a try. 

    Happy Baking :) 

    You might also be interested in;


    3D Twirly Swirly Chocolate Decorations  

    Or make a goldfish...

    and more chocolate with two ingredient Chocolate Soil 

    Friday
    Aug132010

    Chocolate Transfer Decorations for cupcakes

    white chocolate cupcake with whitened ganache, topped with beetroot white chocolate decoration & gold leaf

    Chocolate transfer sheets are a fun & easy way to make professional looking toppers & decorations for your cupcakes.

    To make your cupcake decorations all you need is a chocolate transfer sheet or two, melted tempered chocolate or melted choc/candy melts (compound chocolate). Make sure your chocolate is just warm to touch... if your chocolate is too hot it will melt the design into a messy blur. 

    If you are new to transfer sheets or unsure about tempering chocolate, practising with compound/melts is a good idea as it's more stable and you will find it easier first time around. I'd recommend an offset/cranked spatula too; as it allows you to evenly and thinly spread the chocolate, but you can use a standard spatula.

    an offset spatula makes spreading the chocolate a breeze 

    available in 100's of designs, chocolate transfers sheet are thin sheets of acetate printed with an edible coloured cocoa butter design. 

     Decorations you can make for your cupcakes include...

    Shards; to make shards spread melted chocolate over the entire chocolate transfer sheet. When the chocolate is set peel away the acetate and break the chocolate into shards. Gently press shards into your frosted cupcakes. 

    Shapes; cut pieces of the acetate sheet into shapes. Spread melted chocolate over pieces and leave to set. Alternatively lay the pieces over a rolling pin, in a small bowl etc to create curves, twists or bowls. When the chocolate is set peel away the acetate and use decorations as desired. 

    Piping; Pipe monograms, words, flowers, hearts or patterns directly onto the transfer sheet. Allow the chocolate to set and carefully peel away acetate. Top your frosted cupcakes with your creations.

    aim for thin chocolate for cupcake toppers


    chocolate on transfer sheet piece drying in a curved shape by resting over a mini rolling pin

    peeling away the acetate leaves behind an edible transferred pattern

    Tips;

    If you pipe monograms or cut shapes you will end up with the inevitable "scrap pile", store your scraps in a sealed container and use them to top chocolate dipped truffles or chocolates.

    In hot weather store all your transfer sheets in the refrigerator in a sealed container to prevent the designs melting.

    Chocolate transfer sheets are available online from Fancy Flours (US) carry 125 different chocolate transfer designs, Cakes Around Town (AU), Roberts Confectionary (AU), Cakes Cookies & Crafts Shop (UK)

    Happy Baking :)


    Make your own beetroot flavoured & coloured chocolate here

    Did you miss Chocolate Twirly Swirly toppers? 

    Tuesday
    Aug032010

    Twirly Swirly Chocolate Decorations

                          dark chocolate swirls and twirls decorations

    Join me on facebook today.

    *Updated ... note at bottom about using water instead of vodka

    I love these chocolate twirly swirly decorations that are easy to make with the help of a glass of chilled vodka. You can make abstract shapes like I did today, make straight squiggle shapes, thick or thin shapes, intertwine different coloured chocolates or even piped flowers/designs. Here's how....

    Ingredients

    1 tall glass or tall narrow container of vodka

    melted tempered chocolate of choice

    piping bag fitted with a small round tip

    Method

    Pop your glass of vodka or water in the freezer to chill, you want to be nice and icy cold.

    Fill your piping bag with melted chocolate. Remove cold vodka from the freezer. Holding your piping bag 2cm (bit less than an inch) from the surface of the vodka, apply firm even pressure and pipe directly into the vodka letting the chocolate fall naturally.

           piped chocolate in chilled vodka

    Chocolate will set instantly set on hitting the cold vodka, remove decorations as they are piped to a baking rack to dry. Moving your piping bag as you're piping will create different shapes. Once dry they are ready to use on your cupcakes or plated desserts.

    Try using multiple piping bags at once with a swirling motion to have intertwined shapes. White and dark chocolate look great together.

    Using light pressure with your piping bag will result in "floating shapes", carefully pipe flower shapes and designs remove to baking rack to dry after you have completed each shape.

    *Note "Water"   My preferred method is using vodka because alcohol evaporates quickly and you don't get water marks.  However, you can use iced water if you are using the pieces immediately. There is a high risk of water marking/blooming on standing. You can compensate for water marking by spraying or dusting with food colours or dusting with cocoa powder. As an alternative chocolate be piped directly into a tray of sifted cocoa powder for a 3D effect. 

    Frozen vodka: if you have ever frozen vodka you would have noticed it doesn't 'turn into ice' what you do get is a slight thickening, this is the perfect condition for the chocolate swirls to form. The vodka used has to be the highest alcohol content, lower alcohol brands of vodka will become icy.

    Happy Baking :)

    You might also be interested in;

               Rainbow Chocolate

    try easy Bubble Wrap Chocolate decorations 

    or perhaps a fondant gold fish tutorial 


    Monday
    Aug022010

    Cupcake Cases, Liners, Papers & Wrappers

    Cupcake liners can match your theme, just be pretty or act as an inspiration like these fun cupcake cases from Paper Eskimo.

    Paper Eskimo have added black & white polka dots and stripes to their ever increasing range of paper products. Bake perfectly cute cupcakes in these oil and stain resistant free standing baking cups, or use them to hold lollies, individual desserts or ice-cream.

    Available online in Australia from Little Betsy Baker, US Bake it Pretty, UK Cake Decorating Company

    Happy Baking :)

    Saturday
    Jul312010

    Dresden Cupcake Picks

    golden cupcake, chocolate mousse topped with golden moose dresden

    Ok, I couldn't resist making mousse topped cupcakes for my moose dresdens. Dresdens are German die-cut and embossed paper trims, often with a metallic finish. These lovely scraps popular in Victorian times are beloved by scrapbookers and crafters alike, they also make for unique cupcake picks by just adding a toothpick the to back.

    Paint your tooth picks with matching or contrasting food colour/food paint, allow to dry. Attach toothpick to the rear of your dresdens with non-toxic craft glue or clear sticky tape.

    valentines day mixed pack of dresdens

    metallic or embossed die-cut colour butterfly scraps make beautiful cupcake toppers for spring luncheons to garden weddings.

    vintage Easter sheet, my husband thinks these bunnies are "scary" 

    Halloween dresden assortment

    Dresdens & paper scraps are available in sheets, mixed packs and singularly; designs include Easter, Halloween and Christmas, along with birds, animals, flowers etc. 

    Good sources for dresdens on line are.....

    Dresden Paper Crafts 

    Blumchen (one of Martha Stewarts favourites)

    SilverCrow Creations (where I got the moose from)

    Happy Baking & crafting! :)

    You might also be interested in;

                         Bubble Wrap Chocolate

    Friday
    Jul302010

    Peanut Butter Frosting & Gel Shapes

                        creamy peanut butter cupcake frosting and fruit gel shape

    First post back & I thought I'd go with a simple peanut butter frosting and a not as simple (courtesy of a MasterChef method) moulded gel shapes for the toppers. The frosting is sure to become a family favourite, the gels take a bit more effort, but is a great introduction to using agar agar & gelatine leaves.

    Lets start with the smooth and creamy frosting; perfect to top chocolate, vanilla, peanut or chocolate brownie cupcakes, the peanut butter can be substituted for Nutella for a delicious chocolate hazelnut frosting if desired. 

    Creamy Peanut Butter Frosting

    makes enough frosting for spreading or piping small swirls on a dozen cupcakes

    Ingredients

    1/2 cup butter (softened, but not melted)

    1 cup smooth (creamy) peanut butter

    1/2 teaspoon pure vanilla extract/essence

    2 1/3 cups sifted icing sugar (confectioners sugar) 

    1/4 cup cream (plus little extra if needed)

    Method

    In an a large mixing bowl, beat the softened butter with the peanut butter until light and fluffy. Gradually beat in one cup of the icing sugar, add the cream & the vanilla and beat to combine, gradually add the remaining icing sugar and beat until the frosting doesn't feel grainy when you rub a little between your thumb and forefinger. The frosting should be perfect to spread now, but if necessary add a little extra cream until desired consistency is reached. Spread frosting over cupcakes and either top with a small teaspoon of grape/fruit jelly preserve or top with moulded gels. 

    The moulded jellies; this recipe was created by pastry chef Darren Purchese for a MasterClass episode of MasterChef.

    I used the tubular gel part of the recipe to create the half spheres I used today as cupcake toppers. For the fabulous Fruit Carnival with Sugar Tuile, Aerated Fruit Chocolate and Toffee Apple Dessert recipe visit MasterChef's official site here. 

    carnival inspired dessert featured on MasterChef

    You can tell this is a "chefs" recipe because you need "stuff"... like accurate scales, silicone moulds, agar agar powder, food thermometer & gelatine leaves. The combination two setting agents, 'agar agar' & 'gelatine leaves' results in a soft melt in the mouth gel that is surprisingly robust and easily handled. 

    agar agar powder one the ingredients will need for the gels

    Raspberry half sphere gels

    Ingredients

    •500g raspberry puree (17.6 oz)

    2.5g agar agar powder (0.088 oz)

    6 gold strength gelatine leaves

    Method

    Soak the gelatine leaves in iced cold water until softened.

    gelatine leaves before soaking

    Drain, squeezing out any of the excess water. Reserve in fridge. 

    gelatine leaves after squeezing out excess water

    Place the raspberry puree and the agar agar into a saucepan and heat gently. Stir constantly until the mixture reaches 92 C (197.6 F). Remove from heat and add the gelatine leaves. Stir to dissolve then strain through a fine sieve. Pour the mixture into a squeeze bottle, the fill the half sphere moulds. Chill until needed. You will have left over gel mixture, mould and chill as you would standard jelly (jello). 

    silicone half mini sphere mould

    inside view of the gel's, soft and melt in the mouth texture

    *substitute another variety of berry or a combination of berries for the raspberries in the puree

    *raspberry gel mixture is unsweetened and will compliment sweet desserts or frostings, that said feel free to sweeten the puree if you feel it is too tart. 

    Thank you everyone who sent "get well" and "best wishes" messages, all were wonderful and much appreciated. Great to be back.

    Happy Baking :)

    Tuesday
    Jun152010

    Grated Fondant = Sugar Snow

    grated hard fondant

    Me, who triple wraps all my fondant & modelling paste before storing, apparently hmmm, don't know what the best word would be to describe this... "forgot" ;) Yes, when I ventured back into the kitchen on the weekend I was shocked (truly I was!) I had forgotten to put the lid on my airtight container that stored my white and yellow fondant. 

    I was greeted with perfect white and yellow bricks of fondant that no amount of microwaving was going to soften. What to do?? Grab your grater of course! 

    Hardened fondant, modelling paste or royal icing grates beautifully into soft flakes. Grate, let dry and store in small air tight jars or zip lock bags until ready to use.

    Mix a little white hologram glitter into grated white fondant flakes and you have gorgeous "sugar snow".

    Yellow makes for "pollen" on flower centres, green for "grass", brown for "soil", blue for... well you get the idea! 

    Small moistened yellow fondant balls rolled in grated yellow fondant become pollenated flower centres. 

    Grated fondant can also be used to add texture, like the fur collar on yesterday's...

     'Queen's birthday cupcake'

    Happy Baking :)

    Thursday
    Jun102010

    Hard to bake cupcakes with Pleurisy! 

            Lol, it's hard to bake cupcakes when you have pleurisy! 

    Mark was so happy to hear I have pleurisy he starting shaking the doctors hand... I was expecting high fives any second, they both looked so pleased with themselves.
    For 6 weeks I've been getting tested and have been prescribed everything, including anti inflammatories right the way through to hormones. Suspected heart problems, were superseded by looking for cancers. I changed doctors a few times and it was the third doctor (recommended by Dan's Mum... thanks Debbie!) that found the pleurisy.
    I should be back if not baking, at least with cupcake paraphernalia postings in 3 to 4 days. I am curled up with an old fashioned note pad and pen right now planning cupcakes, waiting to return!
    In the meantime a few past postings you might have missed;
    try your hand a molecular gastronomy

    If you were watching MasterChef last night it was molecular gastronomy night & they had trouble making spheres. If you'd like to give it a try and make yourself fruit caviar/pearls see "Weird Science"
    fruit curds

    Whether you're in chilly winter at the moment or perhaps you are sunning yourself on a glorious summer's day...whatever the season, why not whip up a batch of fruit curd/butter?  easy to do with fruits from tangelo's to raspberries. 
    caramel bite cupcakes with canned caramel

    Perhaps your more in the mood for quick Caramel Bite Cupcakes?

    ever versatile and delicious chocolate ganache

    Then again, chocolate ganache is always tempting!! 
                      Or give toffee a twirl!!! 
    Happy Baking :) 
    Tuesday
    May252010

    Sugar Bark

    coffee sugar bark pieces decorate a chocolate "cupcakecino" 

    This is for my friend Cindy, who is not going to start spinning toffee threads any time soon ;) An easy alternative to traditional toffee garnishes is sugar bark.

    Cons; it doesn't last very long (one hour max) so it has to be made at the last minute

    Pros; it's so fast to make (4-6 minutes) with no toffee pot to clean!!

    You just need sugar, preferably caster sugar (superfine)... and for clear shards that's all you need. You can also add cinnamon/spices, seeds, cocoa nibs, nuts slivers or like I did instant coffee granules & coffee sugar bits.

    Try adding white & black sesame seeds for a garnish for an asian custard dessert, almond slivers look and taste gorgeous in sugar bark or go savoury and pair clear shards with char grilled scallops. 

    Method

    Line at baking tray with a silicone baking mat (at this point my friend Cindy is going to tell me she doesn't have a silicone baking mat... GOOD GRIEF WOMAN... buy yourself one at K-Mart!!)

    Sprinkle caster sugar evenly on the silicone baking mat and bake in a preheated 180c oven for 4 to 6 minutes.

    here I've added a few coffee granules and coffee sugar to get a darker/streaky effect 

    Alternatively you can grill/broil the sugar... either way keep an eye on the sugar, once it starts to melt it browns quickly. Your aiming for a light to mid amber colour.

    thicker sugar on you tray will give you an almost "bubble sugar" look, caster sugar with a little different brown sugar will give you streaks, thin sugar (mine with a coffee granule in it) will give you a clear finish. 

    Cool for 15 to 20 minutes, break into shards use immediately. 

    That's it you have sugar bark.

    Faux Cappuccino

    To make a faux cappuccino, push an unwrapped baked cupcake (preferably moist cake like mud cake) into a cappuccino cup, top with sweetened whipped cream, sprinkle with cocoa or drinking chocolate and top with shards of sugar bark. This works well with for individual tiramisu's too.

    Happy Baking :)

    you might also like;

    quick tiramisu cupcakes

    Tuesday
    May182010

    Fruit Chews part two

    Twice the size of the actual cupcake, a close up view of a Starburst fruit chew rose on "Spring burst cupcake"

    Two months ago I posted a blog entry on how to  colour and shape Starburst Fruit Chews, today is in answer to queries about what else can you make with the softened fruit chews;

               Starburst fruit chews

    Roses

    You don't need any special cutters or ingredients, just fruit chews & a microwave oven. Great for beginners to try their hand at flower making and for the more experienced a pack of fruit chews in the pantry will serve you well in the emergency "I've run out of modelling paste" moment, also great for when you need a particular flavour for your flowers.

    Take your softened fruit chew & roll a small piece to form the centre of your rose.


    Roll other small pieces and wrap around your centre piece one at a time, pinching the bottom of the rose to join as you are forming until you have a fully formed flower. Trim any excess fruit chew from the bottom of the rose with scissors. I used a centre & four petals to make the pink rose (uncoloured strawberry Starburst) on top of today's cake. 

    Ejector cutter blossoms                                             

    All your ejector cutters will work with the softened fruit chews; here I used a tiny blossom ejector cutter to cut blossoms from rolled out fruit chews & then ejected them into foam to produce a shaped flower. 

    Cherry Starburst rose and coloured strawberry Starburst blossoms

    Each Starburst fruit chew produces one rose plus 24 blossoms. Do keep in mind the flavour of your cupcakes, cherry Starbursts are great with Chocolate cake... not as great with peppermint cake!

    Have Fun!!

    You might also be interested in;

     Fruit Chews part one