Navigation
SEARCH
This form does not yet contain any fields.

    Entries in chocolate (46)

    Sunday
    Aug222010

    Bubble Wrap Chocolate Decorations for Cupcakes

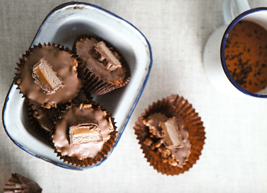
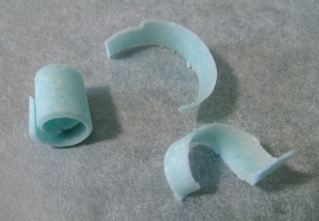
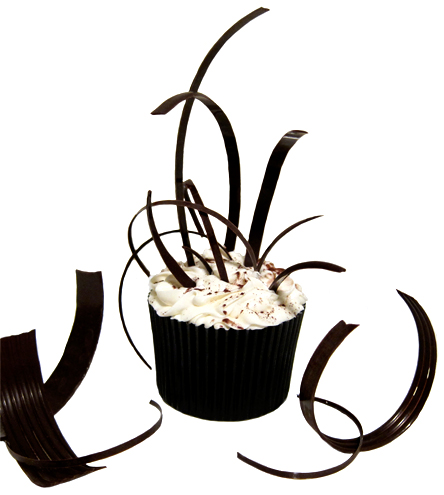
                      assorted bubble wrap chocolate cupcake toppers


    Join me on Facebook or view more cupcakes in my Flickr gallery 

    POP!  POP!  POP! Is this you with a piece of bubble wrap? Stop your "popping" and start making bubble wrap chocolate decorations for your cupcakes. These super easy chocolate toppers are fun to make and I'm sure you have a secret stash of bubble wrap tucked away somewhere right?  

    All you need is a piece of clean bubble wrap and melted tempered chocolate.

    Place your bubble wrap bubble side up on a baking mat or tray.

    Spread your melted chocolate over the bubble wrap.

    Allow the chocolate to set and peel off the bubble wrap & voilà you have bubble wrap chocolate. Your piece of bubble wrap can be used over & over again.

    Want curved pieces? Then lay the bubble wrap with the wet chocolate side upwards over a rolling pin or small bowl, allow chocolate to set and peel away bubble wrap.

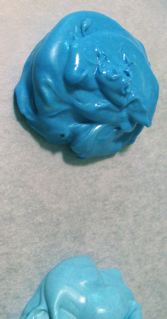
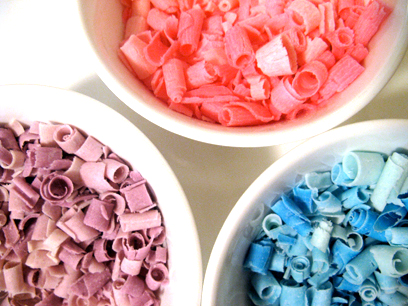
    Want coloured chocolate? The see "colouring chocolate"

    You can also cut your chocolate into shapes or shards; peel away bubble wrap from the chocolate when it is at the "just set" stage and before the chocolate is fully hardened. Use a sharp or serrated knife to cut the chocolate bubble pieces into shape. Or just break pieces off for abstract shapes.

    Make holes in your bubble chocolate by using a heated skewer or tip of a small knife to melt out the middle part of the chocolate bubbles. If you create very thin bubble sheets of chocolate you can pop out the centres with a piping tip etc without having to use heat.

    Bubble wrap chocolate has a variety of applications, all the way from making "coral" for sea scenes or bee hives to the most elegant cupcake decorations. 

    So why are you still reading this? Go on, hunt for that piece of bubble wrap and give chocolate bubble wrap a try. 

    Happy Baking :) 

    You might also be interested in;


    3D Twirly Swirly Chocolate Decorations  

    Or make a goldfish...

    and more chocolate with two ingredient Chocolate Soil 
    Thursday
    Aug122010

    Beetroot Chocolate "Yes!", Beetroot Cookies "No!"

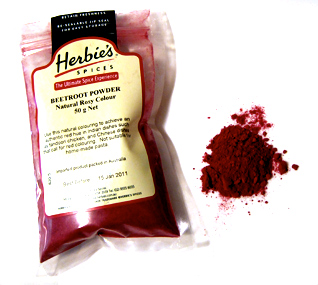
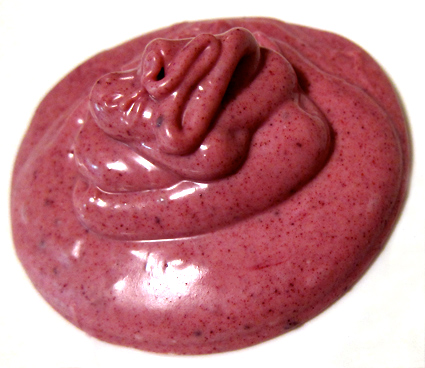
    white chocolate coloured & flavoured with dried beetroot (beet) powder

    Using beetroot powder is great way to naturally colour your icings, frostings and is one of my favourite flavourings for white chocolate. White chocolate flavoured with beetroot has a sweet flavour, slight berry notes and a touch of tingly acidity. The pretty natural speckled colour will add another dimension to your chocolate curls, twirls and shapes. 

    Using beetroot powder in white chocolate;

    stir in 1 teaspoon of sifted beetroot powder for every 100g (3.5oz) of tempered white chocolate. 

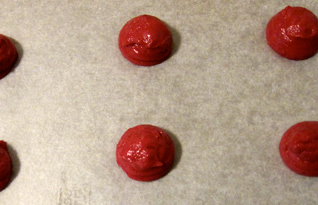
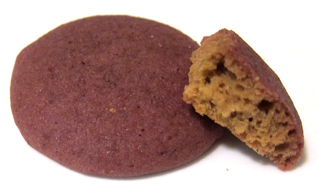
    Alas, beetroot powder doesn't work for colouring your cakes and cookies. The powder is highly susceptible to changes in pH levels, when exposed to pH levels above 7 the colour quickly fades to tan/yellowish brown.


    Before; the gorgeously coloured beetroot butter cookie batter

    After; the combined oven temperature and raising agent (baking powder) fade the colour dramatically

    Soooo, even though you won't be whipping a red velvet cake with your beetroot powder; you can produce deliciously different chocolate, fabulous frostings and fun confectionaries like coconut ice without having to reach for that bottle of red food colouring. 

    Beetroot powder is available is health food stores, selected grocery stores and chef supply stores. 

    Happy Baking :)

    You might also be interested in;

                            Red food colouring

    Friday
    May282010

    Dan's "just hell" Cookies

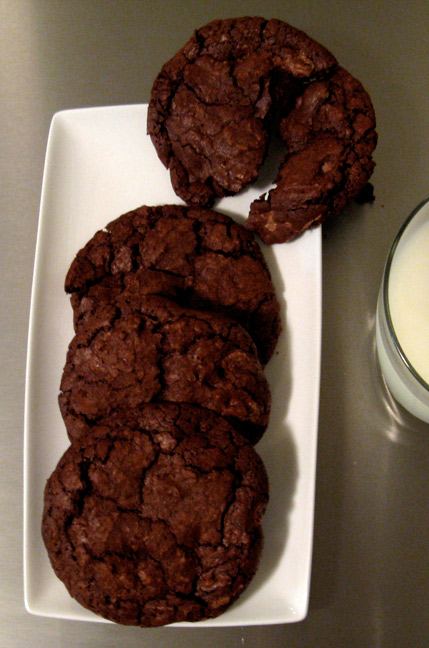
    Dan's "just hell" mudslide cookies

    I had to laugh when I overheard Daniel talking to his Mum on the phone giving her suggestions about what would be a good recipe to try out in her brand new mixer. It went like this "NO! not the mudslide cookies Mum, they taste amazing but it's like hell making them, just hell!!"

    I don't know about the "hell" part, but Daniel sure makes a decadent cookie with his adaptation of Martha Stewart's Mudslide cookies ;) They're not inexpensive to make due to all the chocolate, but they do make fabulous gifts packaged in cello bags, boxes or tins, also ideal for church/bake sales/fetes.. large enough to sell singularly too.

    Ingredients
    Makes about 4 dozen cookies.
    2/3 cup plain flour  (all-purpose flour)
    2 teaspoons baking powder
    1 teaspoon salt
    170g (6 ounces) 70% or bitter chocolate, coarsely chopped
    450g (1 pound) dark eating chocolate, coarsely chopped
    6 tablespoons unsalted butter
    5 large eggs
    1 3/4 cups sugar
    1 1/2 teaspoons pure vanilla extract/essence
    450g (1 pound) cadbury dairy milk chocolate, coarsely chopped
    *extra chocolate (optional) Daniel adds any extra chocolate he finds in the house... up to another 450g (1 pound)... makes an extra 1/2 dozen to a dozen cookies all up.
    Method
    Preheat the oven to 200C (400 degrees F). Line baking sheets with non stick mats or silicone baking paper; set aside. In a small bowl, sift together flour, baking powder, and salt; set aside.
    In a heatproof bowl, or in the top of a double boiler, set over a pot of simmering water, melt together unsweetened and semisweet chocolates and butter; set aside to cool.
    In the bowl of an electric mixer fitted with the whisk attachment, beat eggs, sugar, and vanilla on medium speed until light and fluffy, about 3 minutes. Add cooled, melted chocolate mixture, and combine on low speed.
    Add flour mixture, and continue to beat on low speed until almost combined, about 1 minute. Remove bowl from mixer; stir in milk chocolate & extra chocolate if using by hand.
    Using a standard sized ice-cream scoop, drop dough onto prepared baking sheets about 3 inches apart. Bake until set, 12 to 15 minutes. Let cookies cool completely on baking sheets.
    Alternatives; replace some of the chopped chocolate that is added to the dough with nuts. Or do what Dan does and look around for what you can add... maybe crushed peppermint candy, maybe raisins.... probably not a good idea to add the different things in one batch of cookies ;)
    recipe adaptation, baking and photography; Daniel Paxton-Zahra
    Thursday
    May272010

    Happy Birthday Cindy!!

    dark chocolate birthday cupcake

    I have been friends with Cindy since high school and I have proof ;) Here is our high school photo taken *cough *splutter 31 years ago.

    class photo

             Cindy class photo

                      Me class photo

    Life long friends, we live in neighbouring suburbs and Daniel went to high school with Cindy's kids. I love Cindy, she is an amazing friend and an amazing person. Happy Birthday Cindy!!! Hope you are having a lovely day!

    I wanted a cake that would have been served 30+ years ago & a chocolate frosted cream filled layer cake came to mind, it is what my mum made for me... from a packet mix, bless her heart baking wasn't her forte.

    For the "birthday candle" on the cake I wrapped fondant around a toothpick, the toothpick then goes through the cake to secure the layers. For the flame I used a little yellow & red fondant, attached to candle & glazed with cake glaze. For the minature layer cake I used a 4cm (1.6inch) cutter to cut the centre from another cupcake, split, frosted and filled as per usual. 

    Happy Baking :)

    Tuesday
    Apr202010

    Continue the pattern

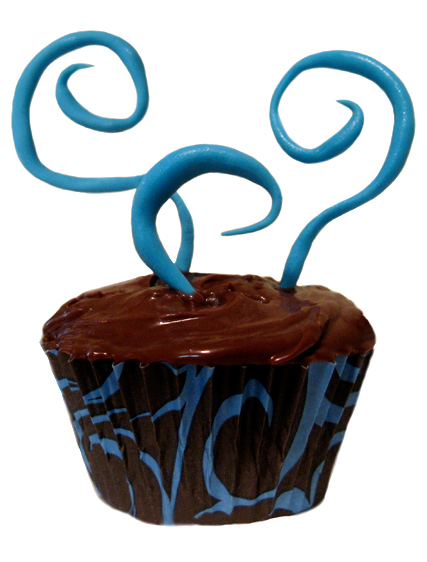
    blue modelling paste swirls top a chocolate frosted mud-cake in blue swirl liner

    Quick Tip~ Continuing the pattern

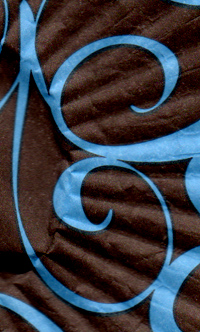
    Adore a pattern on a cupcake liner? Why not continue the pattern to the cake itself; use fondant, modelling paste, buttercream piping, food paint, royal icing or chocolate. It can be as delicate as a soft toned floral peeping over the edge or perhaps polka dot royal icing love heart cookies topping cupcakes in polka dot liners. 

    Do it yourself at home by scanning in your cupcake liner and either copying the pattern by eye or tracing it & transferring to card-stock so you can cut a stencil.

    hmmm, would have been better if I had ironed this cupcake liner between baking paper ;)

    Don't stop there, bring the pattern into gift tags for boxed cupcakes and favour bags too.

    Happy Baking :)

    *I used the foil liners I was having trouble with other day... even with the heavier mud-cake batter they still separated from the sides. I did ganache the cakes at first and it leaked down the sides so I had to spread frosting over the top to cover.

    Tuesday
    Mar022010

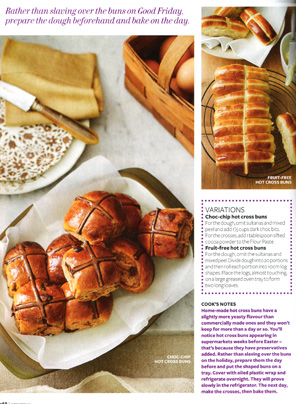
    Chocolate Hot Cross Buns

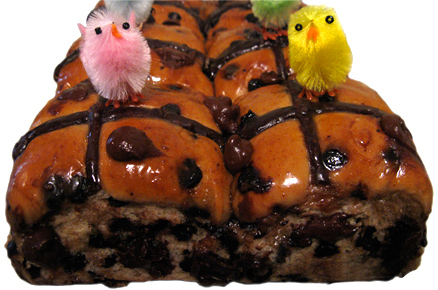
    Chocolate Hot Cross Buns

    Yes, I know it's kitsch but I'm a sucker for those little fluffy chickens!! Each year for Easter we bake at least one batch of hot cross buns, I like mixed fruit with citrus peel, Mark likes fruit and no peel & Dan likes chocolate hot cross buns. I went with Daniel's choice, I didn't have enough chocolate chips so I chopped dark eating chocolate to make up the amount. "Whew" lucky Daniel isn't here today he doubles the amount the chocolate!!

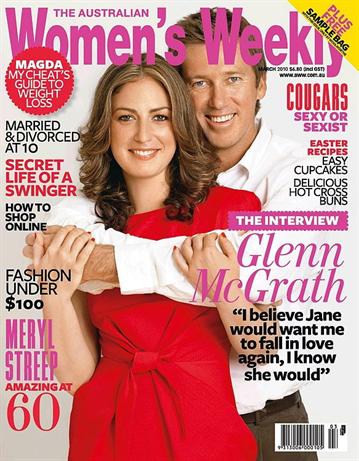
    I got a subscription to the Australian Women's Weekly magazine as part of resigning with our internet provider, I've been pleasantly surprised by the recipe content. This month the magazine contains, Easter Cupcakes, Hot Cross Buns, a French menu from Shannon Bennett (I LOVE Shannon Bennett!), plus slow cooking recipes, a low fat laska & reader recipes.

    Today's Chocolate hot cross bun recipe from...

    Chocolate Hot Cross Buns

    Australian Women's Weekly, March 2010

    Ingredients

    4 teaspoons (14g) dry yeast

    1/3 cup (75g) caster sugar (superfine)

    1 cup (250ml) warm milk

    4 cups (600g) plain flour

    1 teaspoon mixed spice

    1 teaspoon cinnamon

    1/2 teaspoon salt

    80g butter, chopped

    1 1/2 cups of choc chips or chopped chocolate

    1 egg, lightly beaten

    1/3 cup (80ml) of warm water (approximately) 

    Flour paste for crosses

    1/4 cup (35g) of plain flour

    1 tablespoon cocoa powder

    2 teaspoons of caster sugar

    2 tablespoons cold water (approximately) 

    Glaze

    I tablespoon of caster sugar

    1 teaspoon powdered *gelatine

    1 tablespoon of water

    Method

    Combine the yeast with one tablespoon of the sugar and all of the milk in a small bowl; whisk until the yeast is dissolved. Cover bowl and stand in a warm place for about 10 minutes until the yeast mixture is  frothy. 

    Sift the flour, spices and salt into a large bowl; rub in the butter. Stir in the remaining sugar, chocolate, yeast mixture, egg and enough water to make a soft dough. Cover your dough with oiled plastic wrap and stand in a warm place for about one hour or until mixture has doubled in size.

    Turn the dough onto a lightly floured surface and knead for about 10 minutes (you can use your stand mixer with a dough hook for 5 minutes if you prefer) until the dough is smooth and elastic.

    Divide the dough into 20 portions and roll each portion into a ball. Place the balls, almost touching, on a large greased oven tray. Stand in a warm place for about 20 minutes or until dough has doubled in size. Preheat the oven to 220c (425 F) or 200c (395F) if your using a fan forced oven.

    Method Flour Paste Crosses

    Sift flour, cocoa & sugar into a small bowl; gradually stir in enough water to make a smooth thick paste. Place the flour paste into a piping bag with a small tube or put in a zip lock bag and snip off the corner. Pipe crosses.

    Bake

    Bake buns for about 15 minutes or until they sound hollow when tapped.

    Method Glaze

    Combine all the glaze ingredients in a small saucepan and stir over low heat, without boiling, until the sugar and gelatine dissolves. Transfer the baked buns to a wire rack, brush the tops with glaze. 

    Eat warm & enjoy!!

    Tips and variations

    *Cooled buns are suitable to freeze. Wrap well and store in freezer for up to three weeks.

    *For a vegetarian version, replace glaze with warm sieved apricot jam, use a pastry brush to brush over the tops of buns.

    *You can if you prefer make the buns the day before up to the shaping balls stage, cover the balls on the tray with oiled plastic wrap, refrigerate and the next morning bring to room temperature, pipe on the crosses, bake & glaze.

    *Omit cross paste and pipe on melted chocolate crosses if preferred.

    Australian Women's Weekly magazine available from Supermarkets, News-agencies, Borders and subscriptions on line from Magshop

    Thank you Cindy for the fluffy chickens :)

    Friday
    Feb262010

    Australian Women's Weekly Cupcakes

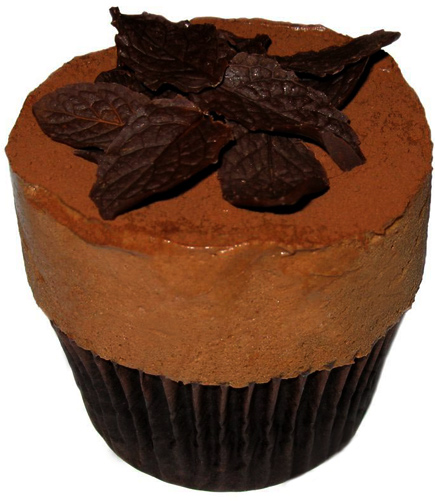
    choc-mint mousse cupcake

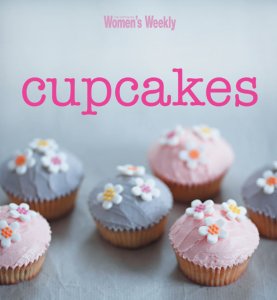
    If your an Australian or from the UK you know the Australian Women's Weekly cookbooks with 100's of titles being published over the years & more than likely you own at least one. The prolific publisher produces title after title, some great and some just okay, there are several cupcake books published by AWW but today we are looking at my favourite Australian Women's Weekly Cupcakes.

    Australian Women's Weekly Cupcakes 128 page softcover

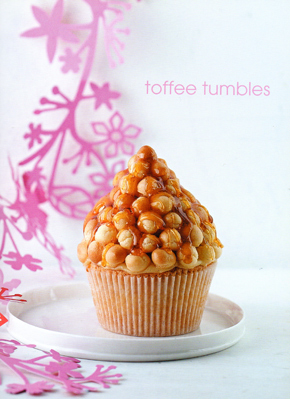
    Australian Women's Weekly Cupcakes book, is certainly a mixed bag of tricks, you'll find a recipe for Toffee Tumbles that has you piping 300 (truly!) tiny choux pastry puffs & then a few pages later a recipe with only 4 ingredients for No-bake chocolate cakes.

    Toffee Tumbles, get out your piping bag for these!

    No-bake chocolate cakes, Dan has made these & everyone loved them!

    The book also covers using, embossing and painting fondant (RTR) icing, plus frosting, ganache, toffee & meringue. Recipes flavours range from Banana Caramel Cakes, Fig & Toffee Crowns to Choc-Mint Mousse cupcakes. Some recipes are inexpensive to produce like Lamington Angels, others will cost you more like the Coconut Kisses where you will need 450g (15oz) of Ferrero Raffaelo Balls.

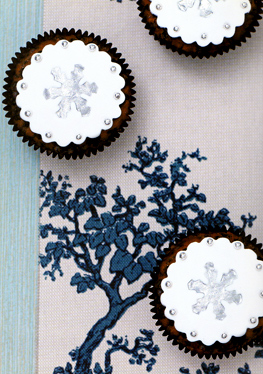
    Christmas snowflakes, embossed & painted fondant

    Whilst there is cakes for the kids, the book does have a lot of what I'd call "dinner party & dessert" cupcakes. Weddings, Christmas and occasions are covered too. With a section on techniques to help you along & a handy conversion chart the small format book packs a lot in within it's pages.

    I like the book for inspiration, I started by making the choc-mint cupcakes page 19 (pictured top), which by the way my husband thinks is the best cupcake I've ever made. I've since taken the technique used & applied it to make my own recipe for frangelico choc-hazelnut mousse cupcakes.

    Recipes can be either be made with cup and spoon or metric weights. As Australian's we do use SR Flour (self raising/rising flour) in recipes, the book tells you how to make your own if you can't get it. Instructions throughout the book are clear and concise. 

    All in all, a different little book from others on the market and well worth getting if you are looking for inspiration, enjoy baking all sorts of cupcakes or an avid cookbook collector!

    Available in Oz from Dymocks, The Bookshelf of Oz

    Amazon US have new and used copies from other merchants here...  Cupcakes   

    Want to see something go terribly wrong from the book?

    Lol, my fault not the books, "When Good Cakes Go Bad!!"

    Wednesday
    Feb172010

    Tool Time & Chocolate Curls

    Tool Time the kitchen tools and gadgets I love

    Yes, it's a veggie peeler! A sharp vegetable peeler is used in chocolate work to trim up those rough edges & ties in with a couple of email enquires I had this week asking how to make the small chocolate curls I used in the Colouring Chocolate entry earlier this month.

    Curls are made straight from a block, bar or in the case of my coloured chocolate "a blob". Hold the chocolate in one hand and firmly and evenly run the peeler down the narrow side. Pressing firmly gives you a tight curl, not as firmly gives a softer curl. The curls have a slightly wood-grain appearance.

    tight curl & two partial curls

    blobs of chocolate for the small amount of coloured curls I needed

    finished chocolate curls

    My peeler of choice to do this? An Oxo Good Grips swivel peeler, it's sharp and the rubber non-stick grip makes it so much easier to hold. I have two, one for chocolate work and one for the veggies! 

    After different curls? Try combed chocolate curls.

    You might also be interested in:

                         Musk

    Monday
    Feb152010

    My Chocolate Valentine

    My Chocolate Valentine cupcake, dark, dark chocolate cupcake with chocolate truffle frosting & sparkly iced chocolate sugar cookies.

    With loads of chocolate truffle frosting left from Daniel's cupcake making, I thought I'd make chocolate lovers valentines cupcakes for Valentines Day.

    Hope everyone had or is having depending where in the world you are, a HAPPY VALENTINES DAY!!

    You might also be interested in:

     Valentines Truffle Pops recipe            

    You might also be interested in:

    Vintage Valentine Cupcake Picks       

    Thursday
    Feb112010

    Tear Drop Hearts

      Raspberry puree hearts in my baked mini Sweet Heart Cheesecakes.

    Valentines Day countdown continues with quick & easy tear drop hearts. 


     Ice your cupcakes or cookies in a base colour, whilst it's still wet apply dots of icing in a secondary colour.

    Armed with a toothpick, drag the toothpick lightly through a dot to create a heart shape.

    This works with glacé icing, royal icing, frosting (try white frosting with a red piping gel), chocolate, and baking.

    It is so, so, humid here; plans of sugar work hearts, chocolate heart shapes, meringues and decorated cookies all had to be scrapped because of the weather. For those in the blizzards on the other side of the world, keep safe, warm & roll on next season!!